Want to install Install the Windows Subsystem for Linux on Windows 11. Read this article to find out the easiest method to do so. By running a single command you will be able to install Ubuntu on your Windows PC/Laptop.
Microsoft is slowly integrating other OS functionality to Windows to make it more useful. Recently in Windows 11, Microsoft introduced Windows Subsystem for Android to run Android Apps in Windows. You can even install Play Store as well through WSA. But, you need WSL to install it. Windows Subsystem for Linux (WSL) is a compatibility layer for running Linux binary executables natively on Windows 11 and Windows 10. In simple words, with WSL, you can run Linux GUI Apps in Windows. So now you don’t need to dual boot in order to run or test Linux apps. It’s quite good for developers.
A year back, Microsoft announced WSL 2, which brings real Linux kernel, through a subset of Hyper-V features. There are two ways to install a Linux bash shell in Windows. You can either manually enable WSL and install the Linux distro.
Or, you can install Windows Subsystem for Linux using the command. Using the command to install WSL is the easiest way, so let’s get started with it.
Contents
Install Windows Subsystem for Linux on Windows 11
Enable Developer Mode
Before we start WSL installation make sure developer mode is enabled. WSL & WSA is not designed for normal Windows users. So to make them work, you have to enable developer mode from Windows settings.
- Open Windows Search, and search for Developer Settings. Developer Settings will appear in search results. Click on Open.
- Windows 11 Developer Settings page will now get open. Do Enable Developer Mode from it.
- Once you enable developer mode. A confirmation window will appear, click on Yes.
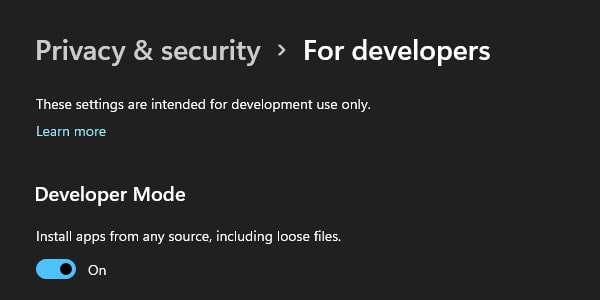
- That’s it, developer mode is now enabled. Let’s move to the WSL Installation Process.
Install WSL with Ubuntu
By default, WSL gets installed with the latest version of Ubuntu. Ubuntu is one of the stable Linux Distro. Though, you can also install a Linux distro of your choice.
- Right-Click on the Windows 11 start button and then click on Windows Terminal (Admin).
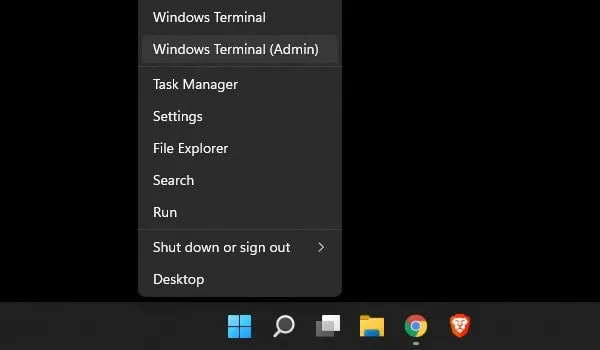
UAC window will appear to click on Yes.
- Windows PowerShell/Terminal window will get open. First type the following command in it, and hit enter to change directory to C Drive.
cd C:/- After that, run the following command to install WSL with Ubuntu.
wsl --install
- The above command will install Windows Subsystem for Linux, WSL kernel, GUI App support, and Ubuntu one by one.
- If due to some reason above command doesn’t work then run the following command.
Alternative Command to Install WSL - wsl.exe --install -d ubuntu- Once all things get installed, you will get a message to reboot your system. So now do restart Windows 11.
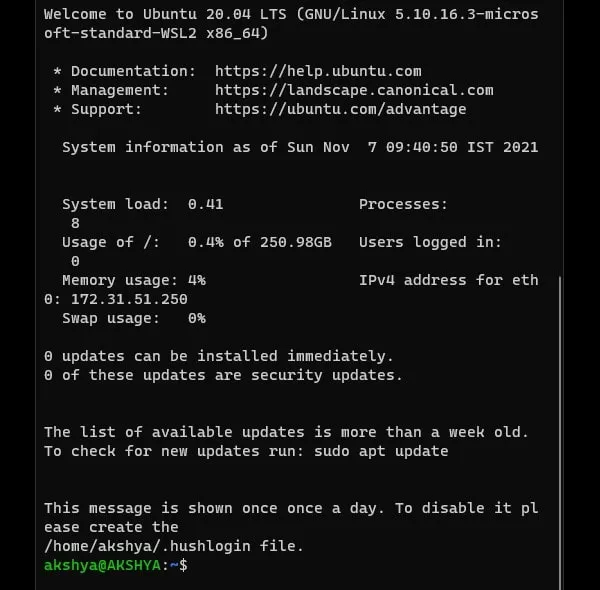
- Once Windows get restarted. Automatically Ubuntu installation window will get appear.
- And, once Ubuntu gets installed. It will ask you to enter the UNIX username and password.
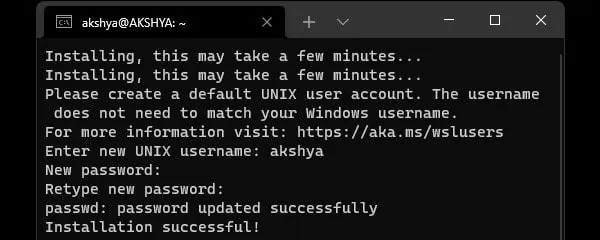
- Setup the username and password of your choice. Also, do remember the password. Once you set up user information, WSL installation will get completed.
- You will now be able to see the installed ubuntu version and other information.
Check WSL Version
You can also check WSL Version and Installed Distro Information by running the following command in Windows Terminal. Don’t forget to change the directory to C before running the command.
wsl --list --verbose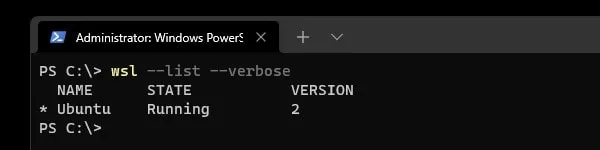
Install Specific Linux Distro
If you don’t want to install and use a specific Linux Distro, that is also possible.
- Open Windows Terminal again by right-clicking on the start button.
- Once Windows Terminal gets open, first change the directory to C.
cd C:\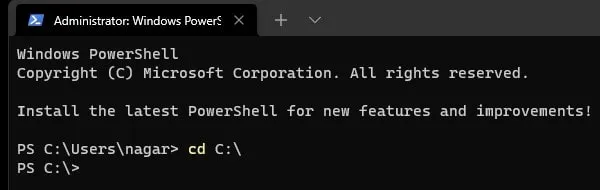
- Now, type the following command to list down all available Linux distro for Windows Subsystem for Linux.
wsl --list --online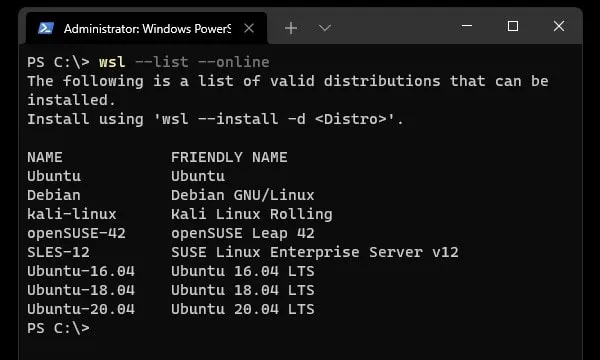
- For instance, I am going to install Debian. You just have to replace the name of the distro in the following command.
wsl --install --d debian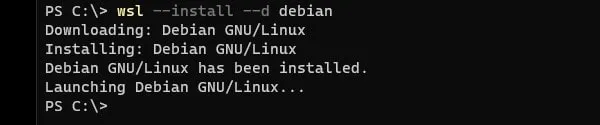
- That’s it, Debin will now get downloaded and get installed automatically. Since the WSL component is already installed, so you don’t have to restart Windows this time.
- Once Debian gets installed, Debian’s GNU/Linux window will appear. And, it will ask UNIX username and password.
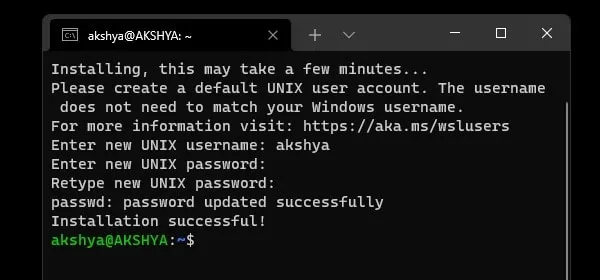
7. Enter new UNIX and Password for Debian. And, Installation successful message will appear.

Update Windows Subsystem for Linux (WSL)
It is optional to update Windows Subsystem for Linux. But, I will suggest you update. Sometimes, Microsoft releases an important update, like a kernel update. It is necessary to update from time to time, in order to work Linux bash shell work flawlessly.
- Open Windows Terminal/PowerShell window and do type the following command.
wsl --update- This command will check and download updates automatically.
- After updating WSL, do type the following command to shutdown all running Linux distro
wsl --shutdown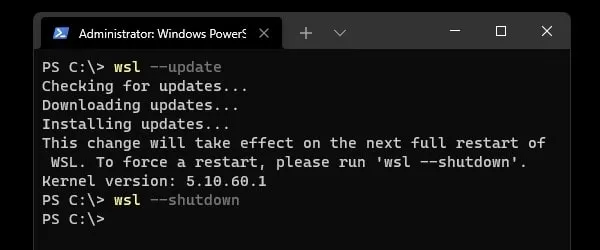
- Now restart Windows PC to apply WSL updates.
Install Linux GUI Apps on Windows 11
Yes, you can run certain Linux GUI Apps in Windows 11 through Commands.
- First, we will run a command to install all components required to install Linux GUI Apps.
- Click on the Start button and open a Linux distro that you’ve installed. I am opening Ubuntu here.
- Once the Ubuntu bash shell gets open, run this command to install the required components.
sudo apt-get update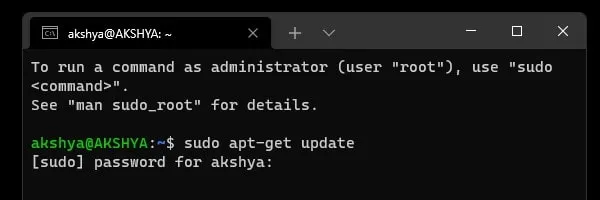
- Ubuntu will now ask for the UNIX password that you have entered during installation. Type password and press enter.
- Now wait for all updates to get installed.
- Now we are going to type a command to install the gedit text editor.
sudo apt-get install gedit -y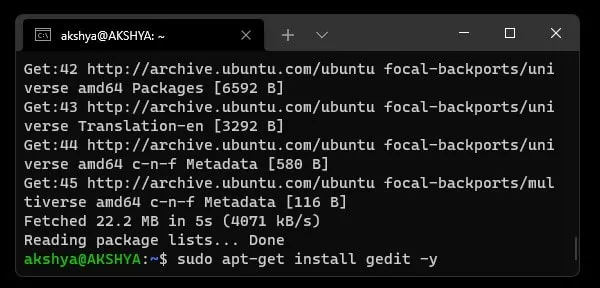
-y command will suppress many prompts here.
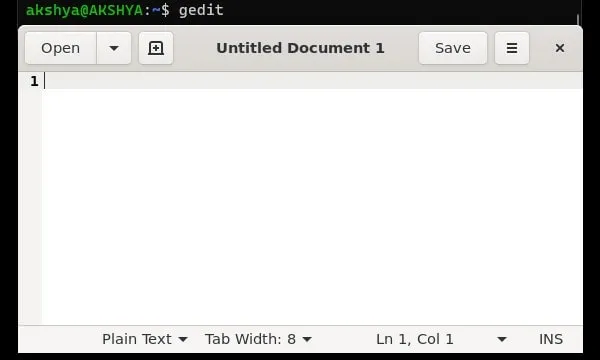
- The process will now take time. Once installation gets complete. You just have to type the application name to open it.
- Type gedit and press enter to run gedit text editor. Alternatively, you can search for Text Editor (Ubuntu) in Windows search.
That’s it, now you can run Linux GUI Apps on Windows by running commands. Ok, so this was the method to install Windows Subsystem for Linux on Windows and install WSL updates.