Like Android’s quick settings menu, Windows OS also comes with a Windows Mobility Center (WMC). That you can quickly access it by right-clicking on the battery icon on your Windows laptop. Yes, there are some other ways as well to open Windows Mobility Center, like from the control panel, app search, and the WinX menu. But, If Windows Mobility Center is missing from everywhere on your laptop or Desktop PC. Then, this article will help you to Enable Windows Mobility Center on your PC.
Windows Mobility Center is missing on the PC.
By default, WMC is disabled for desktop computers. Because most of the Windows Mobility Center features are laptop/tablet-oriented. This means you can access WMC only on Windows devices that run on battery. Though, If your computer is connected to a UPS, then Windows will enable Windows Mobility Center for you. Well, no worries, with a few tweaks you can even enable it on PC as well.
Although, If you try to open it using Run App. You will get an error message that:- “Windows Mobility Center is available only on laptops”.
- Press Windows + R key.
- Type
mblctrin Run Windows and Press Enter.

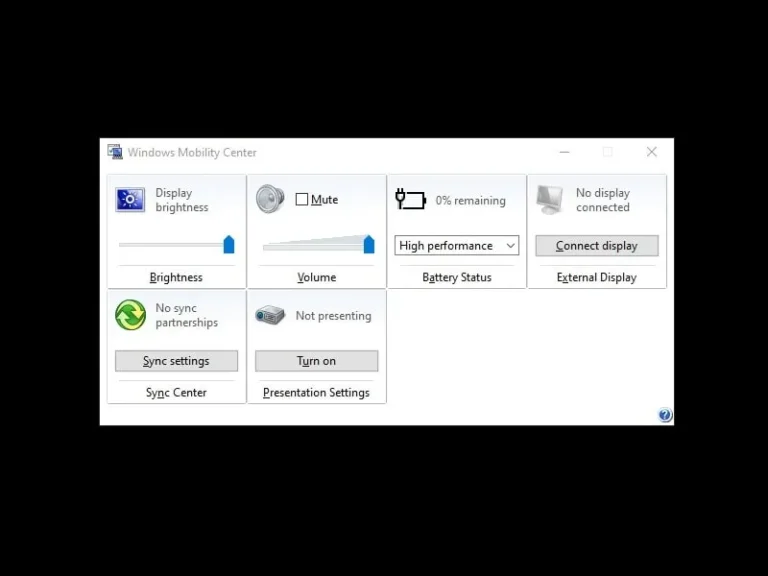
What is Windows Mobility Center?
The Windows Mobility Center (mblctr.exe) provides a quick settings menu for the most commonly used settings. Like, Brightness, Volume, Battery Status, WiFi, External Display, Sync Center, and Presentation Settings. Also based on the hardware you’re using you will get more or fewer quick settings tiles. e.g. If your laptop comes with a backlight keyboard. Then, you will get an option to turn the keyboard backlight on/off in Windows Mobility Center. Overall, Windows Mobility Center is quite useful for laptop users.
Enable Windows Mobility Center on PC using CMD/PowerShell
As I mentioned, Windows Mobility Center is available only for laptops. Or, computers that are connected to UPS. So it clearly means that Windows does check whether the battery is connected or not. And base on that, Windows does enable/disable WMC. So, if we can force Windows to skip battery check, then, we will able to access Windows Mobility Center.

And, this is possible by modifying registry settings. Well, no worries, to make this process simpler, I have created a few commands. You just have to run those commands to enable or disable Windows Mobility Center on your PC.
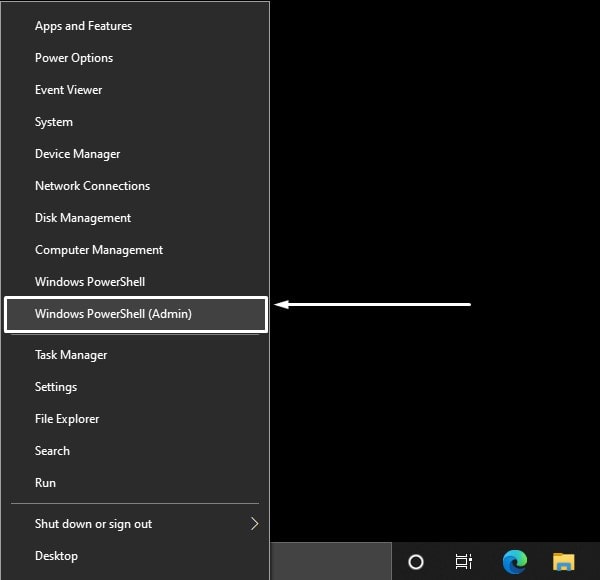
- Right-Click on the start button in Windows 11, and then click on Windows PowerShell (Admin) / Terminal (Admin). You can also use Command Prompt (Admin), if using an older version of Windows.
- UAC Windows will appear, click on Yes.
- Now, type the following commands one after one. And, press Enter key after each command to run it.
reg add HKEY_CURRENT_USER\Software\Microsoft\MobilePC\AdaptableSettings /v SkipBatteryCheck /t REG_DWORD /d 1 /freg add HKEY_CURRENT_USER\Software\Microsoft\MobilePC\MobilityCenter /v RunOnDesktop /t REG_DWORD /d 1 /f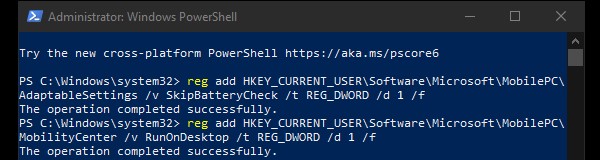
- The operation completed successfully message will appear after each command.
- Now, to run Windows Mobility Center. First, press the Windows + R key to open Run Window. Now type mblctr.exe in it and press enter key.

- That’s it, Windows Mobility Center will get open. To quickly access it next time, do pin it to the taskbar.
Disable Windows Mobility Center on PC.
- If you want to disable Windows Mobility Center for whatsoever reason. Then, you have to run the following two commands in Windows PowerShell and Command Prompt.
reg delete HKEY_CURRENT_USER\Software\Microsoft\MobilePC\AdaptableSettings /v SkipBatteryCheck /freg delete HKEY_CURRENT_USER\Software\Microsoft\MobilePC\MobilityCenter /v RunOnDesktop /f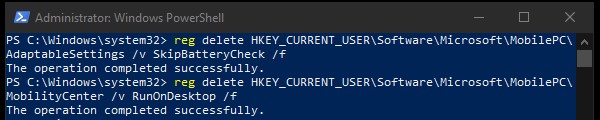
- Again, the operation successfully completed message will appear. And, this time Mobility Center will get disabled. If you try to open it, you will get the same error message, you were getting before.
Enable mblctr.exe (WMC) using Registry File.
This method is similar to the first one. In the first method, we modified registry settings using commands. The same you can do with a registry file. Yes, I have created two registry files – one file is to enable Mobility Center and another is to disable it. Though the process is risk-free, though, if you like, you can take a registry backup.
- First, do download both registry files, to Disable and Enable Windows Mobility Center on PC.
- Right-Click on the “Enable Windows Mobility Center” file and then click on Merge.
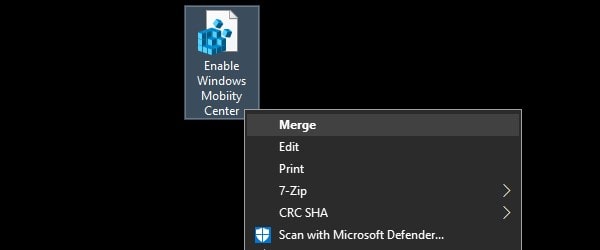
- A Security Warning window will appear, click on Run.
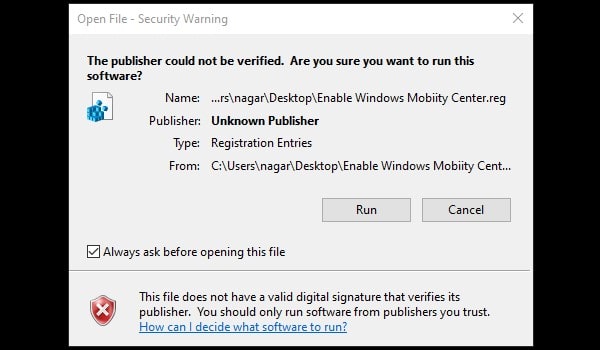
- Now, the UAC window will appear, click on Yes.
- A Final Confirmation window will appear, click on Yes.

- That’s it, Key and value contained in the registry file will get merged with your Windows Registry.

- Now, Press Windows + R key, type mblctr.exe, and press enter. Windows Mobility Center will get open.
- If you want to disable Mobility Center then do run the Disable Windows Mobility Center file.
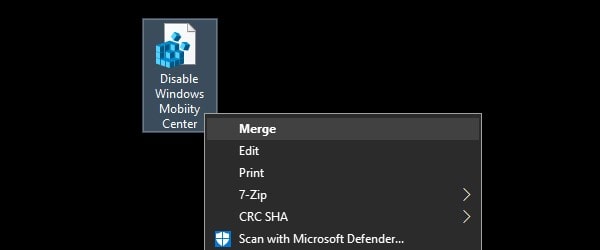
- And, follow the same process to run it. (Merge > Run > Yes > Yes.)
- Windows Mobility Center will get disabled after successfully running the file.
Ok, so these were two ways to enable/disable Windows Mobility Center on Desktop PCs.