
In Windows 11, Microsoft has introduced so many new features like widgets, Android Apps support, Snap Layouts, Virtual desktops, and many more. Even, so many taskbar customization options have been introduced. But still, the network speed monitor on Windows 11 missing. In Android, you can enable network speed indicators easily from the settings app. But, in Windows, such an option is missing and much needed. Yes, undoubtedly, the task manager shows the download/upload speed of an active internet connection in send/receive data form. But, you cannot pin it to the taskbar. Like, you can add performance stats to the Windows 11 taskbar.
Well no worries, there are some free third-party apps and tools available. Which shows your Internet connection’s download and upload speed in real time. This means you can constantly track active internet usage on your Windows PC/Laptop. Which will help you to track down connection issues in your network. Also, these net speed monitor apps will work on both Ethernet and WiFI connections. There are so many Internet Speed Monitor Apps available for Windows 11 to use. So, feel free to choose an app that adds a network monitor to the taskbar, and, comes with numerous customization settings.
Add network speed monitor to the Windows 11 Taskbar
Net Speed Meter.
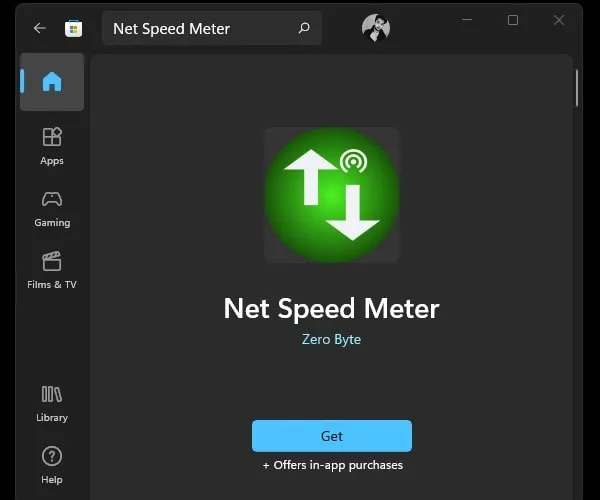
If you don’t want to download an App from a third-party source, then Net Speed Meter is the best app for you. It is available for free on the Microsoft Store. Net Speed Meter app shows the real-time download and upload speed of your internet connection. And, runs in the system tray. The best part is you can drag and drop the network monitor anywhere on the desktop, so no restrictions. App also comes with so many customization options. Like, you can change the speed unit from bits per second to bytes per second. Moreover, you can change the font and text size. Even, you can change the color & theme as well.
By default, the Net speed meter is set as a startup app. So, it gets automatically started when you start Windows 11, no need to run it manually every time. The app does refresh the network speed every 500ms. Which you can change if you want. Test Speed option is also available to perform an Internet Speed Test.
- Click on the start button and after that, click on Microsoft Store App from the pinned apps section.
- Microsoft Store will get open, and search for Net Speed Monitor. Or, you can use the following link to directly open the App page.
- Once you find the Net Speed Monitor app, click on Get to install it in your Windows 11.
- The app will now get downloaded and installed, click on Open to launch it.
- You will now immediately see a Network Speed Monitor in the upper right corner of your desktop.
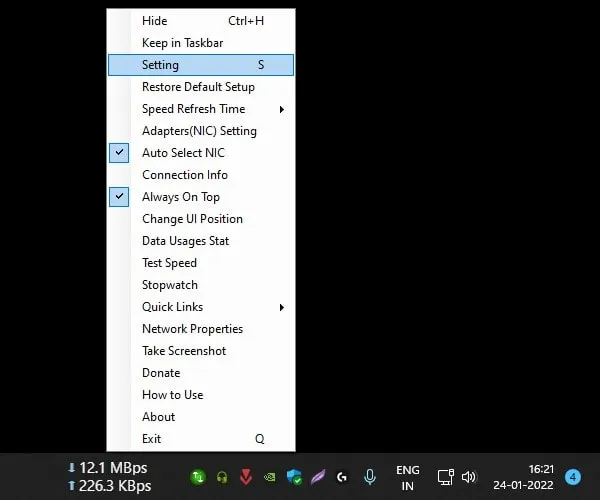
- Do right-click on it, and a menu will appear. Click on “Keep in Taskbar”.

You can also drag and drop the network speed meter wherever you want.
- Once you set it to the desired position, right-click again on it and click on settings.
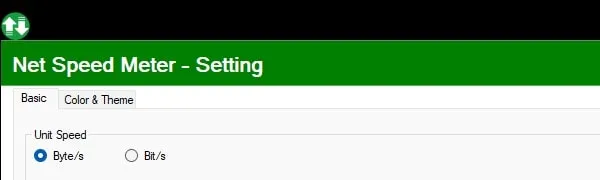
- Select Byte/s in unit speed so that you will get an accurate result. You can also change font and size if you want.
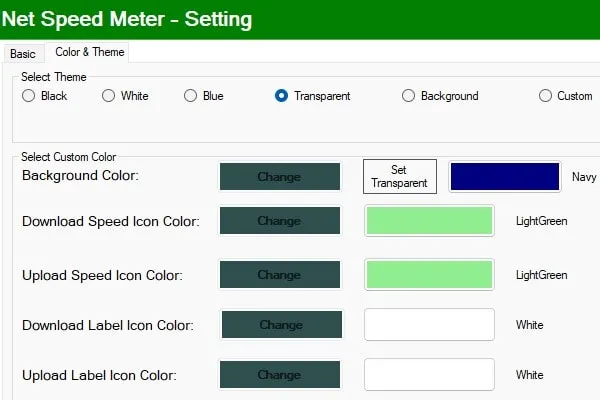
- After that, click on Color & theme and now select the transparent theme. So that it can blend with your Windows 11 theme.
Also, you can change the speed refresh time to fast. By default, it might be set to normal. Okay, so that’s how you can add Network Speed Monitor to the Windows 11 Taskbar.
Windows 11 Traffic Monitor
Traffic Monitor is another free and open-source Windows 11 app to display Windows 11 real-time network speed. Apart from Internet Speed, this app also can display CPU and Memory usage in the taskbar. The traffic Monitor app also can display “historical traffic statistics”, which are locked in the net speed meter app. So definitely, this app is better than that.
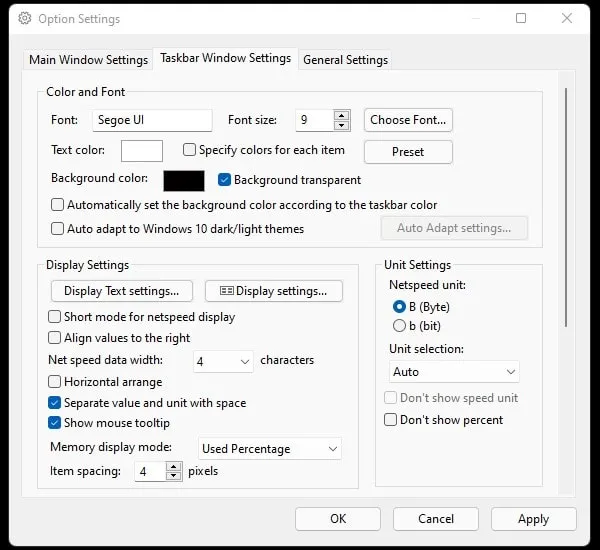
The traffic Monitor app comes with two network monitor windows – Main Window and Taskbar Window. The Main Window offers you a graphical interface, which you can drag and drop anywhere on the desktop and lock. But, you cannot drag the main window to the taskbar. So, if you want to add a Network Speed Monitor to the taskbar on Windows 11, then the taskbar window will help you with it. Traffic Monitor also comes with many customization options.
You can customize where you want to show the network monitor in the taskbar. Also, you can choose the background color, text, and theme. Even, you can change the net speed unit as well. Skin replacement function is also available for the main Window. Personally, I find it better than the Microsoft Store.
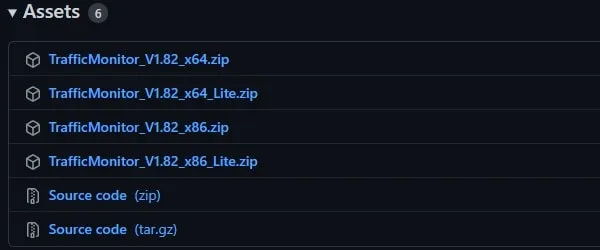
- First, do download the zip file of TrafficMonitor from GitHub.
It is available for 64-bit and 32-bit Windows OS. Also, there is a lite version also available, but better to download the main version.

Note: I am using Windows 11 64-bit version, so I have downloaded the “TrafficMonitor_V1.82_x64.zip” file.
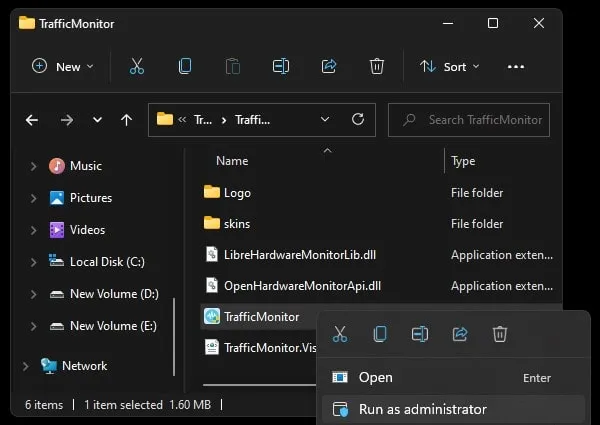
- Once the zip file gets downloaded. Do right-click on it and then click on Extract All > Extract.
- Open the extracted TrafficMonitor folder and then right-click on the “TrafficMonitor” file and click on “Run as administrator”.
Windows Protection window might appear. Click on More Info > Run anyway. You will now see a shield icon in the Windows taskbar. Click on it and after that click on Yes in the UAC window.
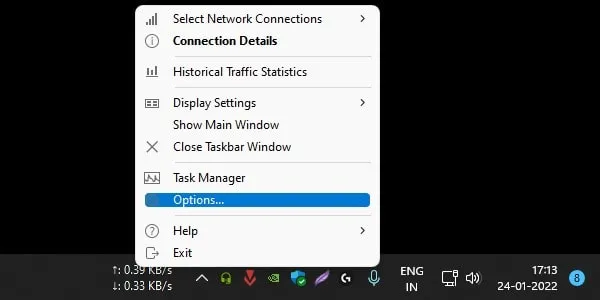
- That’s it, the main window of TrafficMonitor will now appear. Right-click on it, and then click on “Show Taskbar Window”.
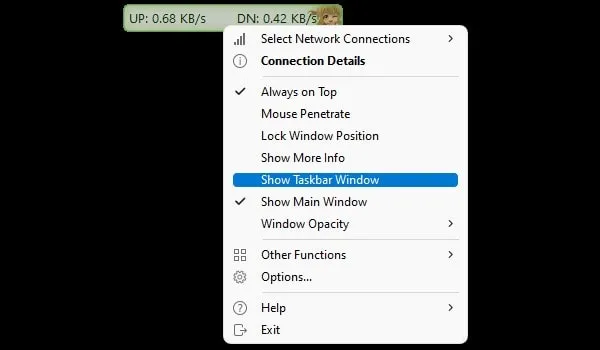
Internet Speed Monitor will now appear in the taskbar.
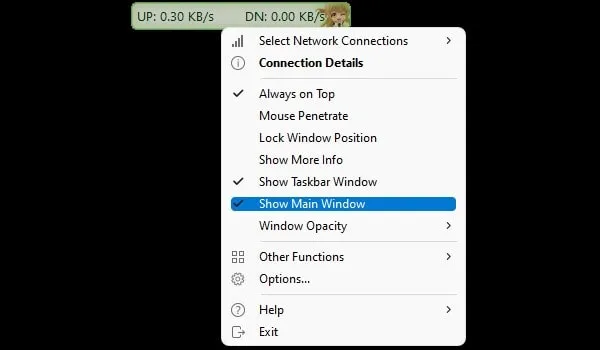
- Now to disable the main window, right-click again on it. And, after that, click on “Show main Window” to uncheck it.
- Okay, now right-click on TrafficMonitor visible in the taskbar. And, click on options to open settings.
- You can now customize the taskbar window. Also, you can change the net speed unit if you want.
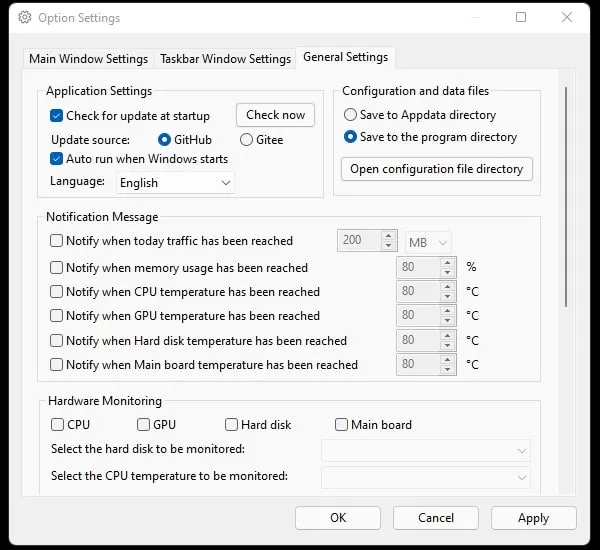
- Click on the General Settings tab. And, do enable the “Autorun when Windows starts” option. Also, select English as the language and click on Apply > OK.
That’s it, so that was the easiest way to add real-time download and upload speed to the Windows 11 taskbar.