It’s been a while since Microsoft has released Windows 11 23H2. The latest Windows 11 comes with a Copilot, which is basically an artificial intelligence assistant. It’s quite easy to install Windows 11 on latest computer using Windows 11 Installation Assistant. However, for some reasons you want to try Windows 11 23H2 before installing it as your primary operating system. Then, you can download and Install Windows 11 in VMware.
If you own a high-end PC, then, you can follow this article. Because to run Windows 11 on a virtual machine, you need to allocate good resources. Ok, without a further delay, let’s get started.
Also, if you have already installed Windows 11, then now you can run Windows 11 Emulator inside it. This means, no need to create a virtual machine, just do enable Windows 11 Sandbox.
Download and Install Windows 11 in VMware (Installation Process.)
Create a Windows 11 Virtual Machine.
1). First, Download Windows 11 23H2 ISO File.
2). After that, download the latest version of VMware Workstation Player.
3). Install VMware Player on your Windows PC.
4). Make sure to select “Enhanced Keyboard Driver”. Yes, you need restart your computer once after installation.
5). After restarting computer, do open VMware. Select “use VMware workstation player for free for non-commercial use”.

Note: Alternatively, you can use VirtualBox Software.
6). Once, VMware gets installed open it. And, click on “Create a new virtual machine”.
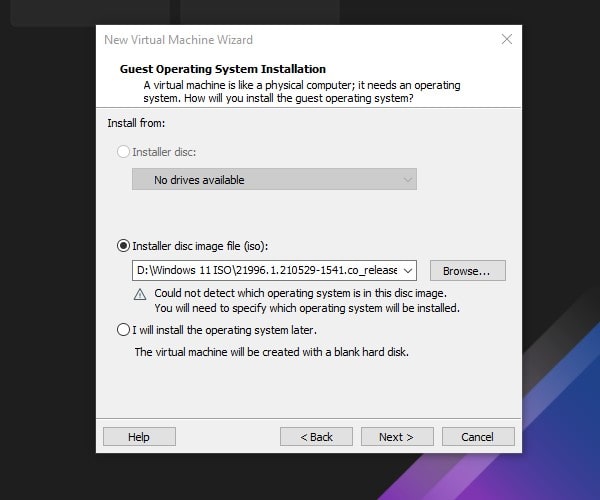
7). Select the “Installer disc image file (ISO)” radio button option. Click on Browse and then select the Windows 11 ISO file click on Open.
Click on next.
8). In select a guest operating system window, you don’t need to make any changes, click on next.
9). Now, Enter Windows 11 in the virtual machine name and click on next.

10). Encryption Information window will appear. First, generate a password and do select “Only the files needed to support a TPM are encrypted” option.

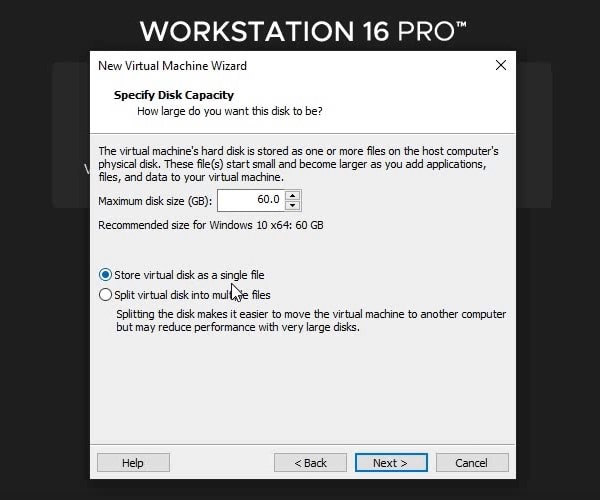
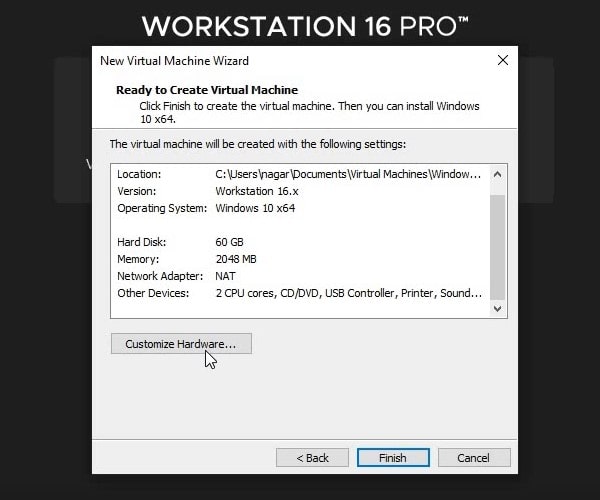
11). Select the “Store virtual disk as a single file” option. You can change disk size if you want. Or, keep it 60 GB and click on next.
12). Next, click on customize hardware.
13). And, use the slider to select 4GB RAM. (Make sure your computer has enough RAM. On my PC, I have installed a 16GB RAM stick.)
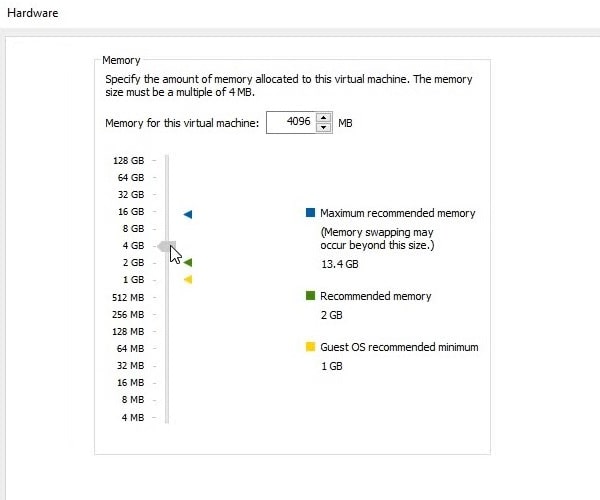
14). Also, make sure the processor core is 2, and click on ok. (You can select core as per your processor. I am using Hexa(6) core processor, so selected 2 core.)
15). Click on Close.
16). Click on Finish. That’s it, you have created a Windows 11 virtual machine successfully.
Run Windows 11 Virtual Machine and Install Windows.
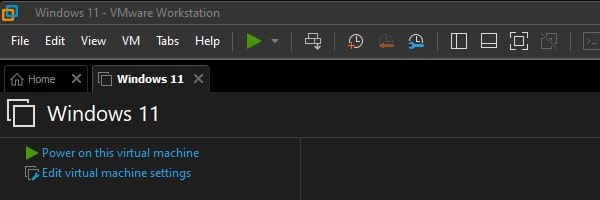
1). Click on Power on this virtual machine option.
And, the virtual machine will ask you to press any key to boot.
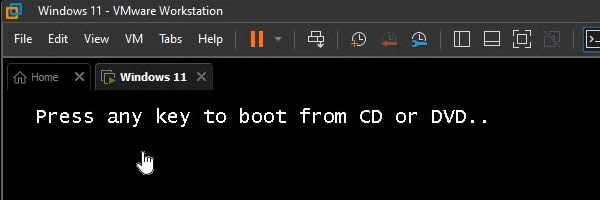
First, you have to press Ctrl + Alt key to use the keyboard in Virtual Machine. After do press any key from Keyboard to continue the setup process.
How to Fix Timed Out Error.
- If the timed-out error appears. Then, do close Windows 11 virtual machine. Click on the (X) icon and then click on power off.
- After that, click on Open a new virtual machine.
- Go to documents > Virtual Machines > Windows 11 > Click on open.
- That’s it, now again click on the “Power on this virtual machine” option. And, this time, click on the virtual machine and then press the ctrl+alt shortcut key and after that press any key.
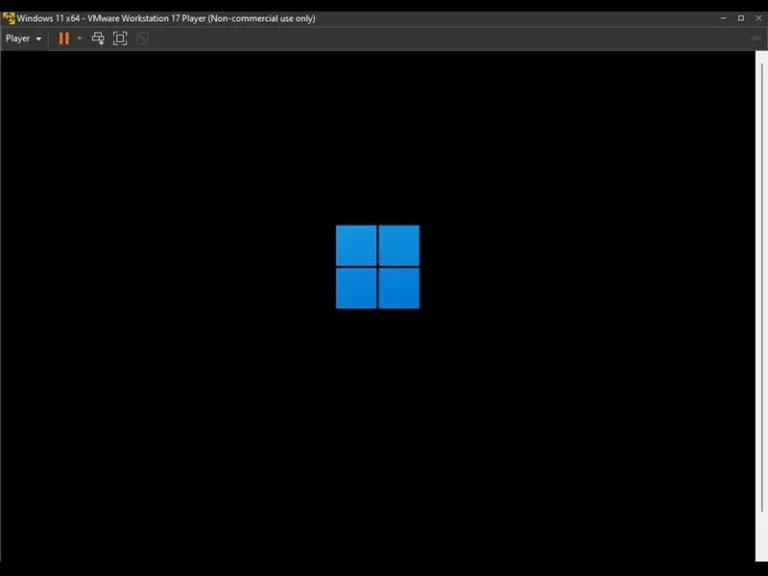
2). Windows logo will now appear. And, Windows 11 installation window will appear.
Select language and other options and click on next.
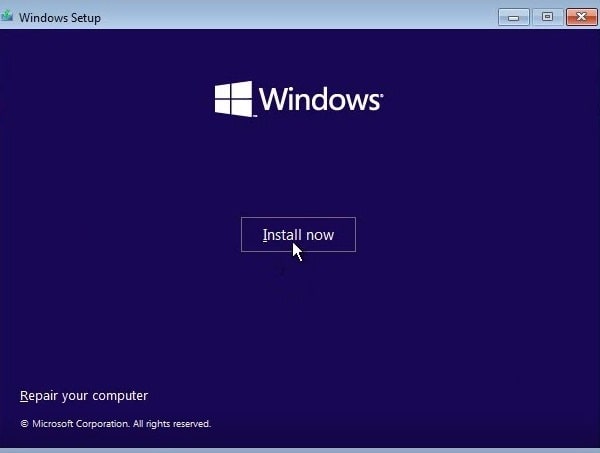
3). Click on Install Now.
4). Click on “I don’t have a product key”.
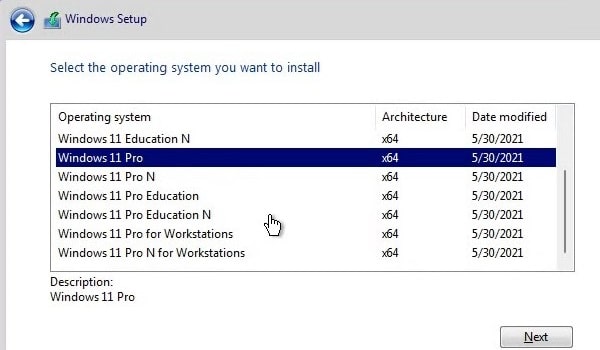
5). Select a Windows 11 version now and then click on next. (I am installing Windows 11 Pro, you can install any version you want.)
6). Accept the license agreement and then click on next.
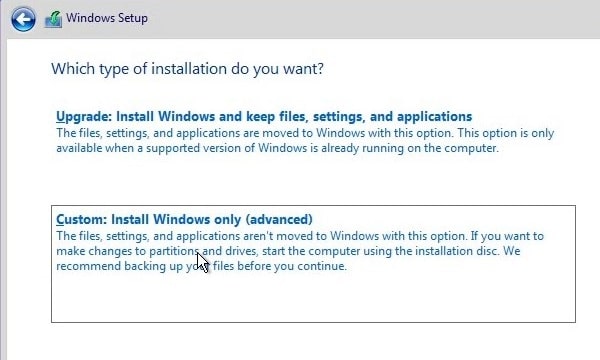
7). Click on “Install Windows Only(Advanced)”.
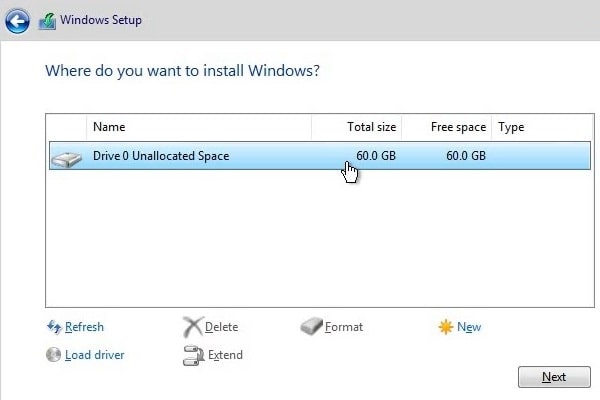
8). Unallocated space that you have created before will now appear. Click on Next.
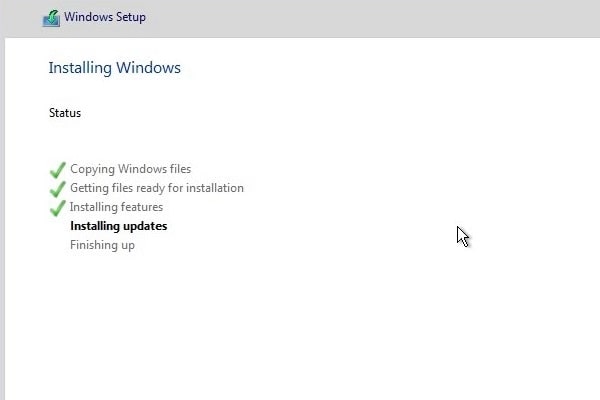
9). That’s it, now just wait Windows 11 installation process will get started.
The virtual machine will restart a couple of times during the installation process.
10). Once the installation process gets completed. Windows 11 initial setup screen will appear. You can set up Windows 11 on your own. Or, you can watch the video on GeekBullet’s YouTube channel, if you face any issue during setup.
You also need to enter your Microsoft account details. You can create a new account if you want during the setup process.
Ok, so that’s how you can Install Windows 11 23H2 ISO in VMware. If you have any questions to ask, let me know in the comment section.