Converting a Website into an Android App can help you to reach more users. And to do so, so many online Web to App converter platforms are available. But, I will recommend you not to use those. Because these App builder platforms usually insert ads in the free app, and even puts a watermark. Yes with premium, you can get complete control over your App. However, the best way to develop an Android App is through Android Studio.
What is Android Studio?
If you’re unaware, Android Studio is the official integrated development environment (IDE) for Android OS. By using it you can develop Apps for all kinds of devices that are running Android OS. It also offers virtual Android devices to test Android Apps.
Yes, to develop Android App, you need coding skills. Like, C++, Java, XML, Kotlin. But, no worries, if you don’t know how to code. Because, in this article, you will get step by step guide to developing Android App with all Code. Since we are turning a Website into an Android App. So, we are going to use Android System Webview help to load the website in the App.
What is Android System Webview?
The Android System WebView allows applications to access browser functionality without displaying browser windows. There are almost all E-Commerce, Banking, and Social Media apps use Android System Webview. Android app developers integrate WebView in the App, when, they want to display webpages within the App. And since we are turning a website into an App, so we are going to use WebView Code.
So, here’s how to convert a Website into an Android App using Android Studio.
Contents
Convert Website into Android App Free
Install Android Studio on Windows Computer
- First, do download Android Studio’s latest version from its official website of it. You have to agree to the terms and conditions before downloading it.
- Once, the Android Studio setup file gets downloaded, run it as administrator by right-clicking on it. UAC Window will appear, click on Yes.
- Android Studio Installation Wizard will get open, click on next.
- If you want to test your App on your Computer. Then do select the “Android Virtual Device” option and click on Next.
- Next, select the Android Studio installation location and click on Install.
Android Studio Initial Setup
- Once, Android Studio gets installed, do open it. Now select the “Do not import settings” option, and click on ok.
- Android Studio Setup Wizard will get open, select standard installation and click on Next.
- Now, select your preferred Android Studio theme, and you can select the dark theme.
- Setup will now ask you to verify settings, click on Next.
- A license Agreement Window will appear. Here you have to agree to two licenses, by selecting from the left pane.
- Android-sdk-license
- Intel-Android-Extra-License
- After accepting license terms, click on Finish. Android Studio will download some components. Once the process gets complete, click on Finish.
Create a New Project in Android Studio
- Welcome to Android Studio Window will appear, do click on New Project.
- Select “No Activity” in the New Project window and click on Next.

- Next, replace MyApplication with your App Name. (Basically, enter the website name of which App you’re creating.)
- Now, in the package name do replace “
com.example.myapplication” with your app package name. (E.g. I am creating my Blog App. So, the package name I entered is “com.app.geekbullet“.)
- Select Java Language and keep API 24 selected. Click on Finish.

- Android Studio window will now open. A tip window will appear to close it. Now, just wait for the new project to load.
Codes to Develop Website-Based Android App.
- From the left pane, double-click on app > manifests.

AndroidManifest.xmlthe file will get open in the middle of the Android Studio screen. Erase everything from the file by selecting all codes and pressing backspace.
- Now, copy and paste the following code inside the AndroidManifest file. We are adding internet permission in this file.
<?xml version="1.0" encoding="utf-8"?>
<manifest xmlns:android="http://schemas.android.com/apk/res/android"
    xmlns:tools="http://schemas.android.com/tools">
    <uses-permission android:name="android.permission.INTERNET" />

    <application
        android:hardwareAccelerated="true"
        android:allowBackup="true"
        android:dataExtractionRules="@xml/data_extraction_rules"
        android:fullBackupContent="@xml/backup_rules"
        android:icon="@mipmap/ic_launcher"
        android:label="@string/app_name"
        android:supportsRtl="true"
        android:theme="@style/Theme.GeekBullet"
        tools:targetApi="31">
        <activity
            android:name=".MainActivity"
            android:exported="true"
            android:configChanges="orientation|screenSize">

            <intent-filter>
                <action android:name="android.intent.action.MAIN" />
                <category android:name="android.intent.category.LAUNCHER" />
            </intent-filter>

        </activity>
    </application>

</manifest>- After that in
android:theme="@style/Theme.GeekBullet". Replace the GeekBullet with the App name you entered. (Do enter exactly what you entered in the name field while creating a new project.)

- Now, from the left-pane double-click on java. After that, right-click on the package name and click on New > Java Class.
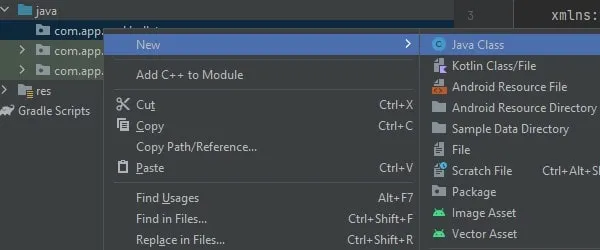
- A small window will get open. Type MainActivity in it and press enter.

MainActivity.javathe file gets opened. Erase the “public class MainActivity {}” code. And, Do copy and paste the following code after the package name line. This is the main code file.
import android.os.Bundle;
import android.webkit.WebView;
import android.webkit.WebViewClient;
import androidx.appcompat.app.AppCompatActivity;

public class MainActivity extends AppCompatActivity {

    private WebView myWebView;

    @Override
    protected void onCreate(Bundle savedInstanceState) {
        super.onCreate(savedInstanceState);
        setContentView(R.layout.activity_main);
        getSupportActionBar().hide();
        myWebView = (WebView) findViewById(R.id.my_webview);
        myWebView.getSettings().setJavaScriptEnabled(true);
        myWebView.setEnabled(true);
        myWebView.setBackgroundColor(getResources().getColor(android.R.color.white));

        myWebView.setWebViewClient(new WebViewClient());

        String url = "https://example.com/";
        myWebView.loadUrl(url);
    }
}- Replace the
https://example.com/URL in code with your Website URL. Since we are converting the website into an app. So, you have to enter the website URL, that you want to turn into App.

- Now, from the left pane, double-click on the res. And, after that, do right-click on res and select New > Android Resource Directory.
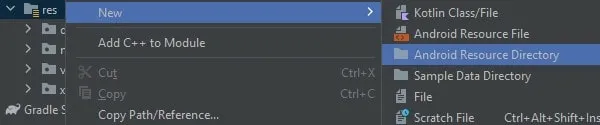
- Now, in Resource type do select the layout and click on ok.

- You will see the Layout folder in Res. Do right-click on it and then click on New > Layout Resouce File.

- Type
activity_mainin the file name and click on ok.

- You will see an Android Layout screen will appear. From the right side of the screen, click on the code option to open the
activity_main.xmlfile.

- Now, copy and paste the following code into the
activity_main.xmlfile. Now, we are adding WebView to the app.
<?xml version="1.0" encoding="utf-8"?>
<RelativeLayout xmlns:android="http://schemas.android.com/apk/res/android"
   xmlns:tools="http://schemas.android.com/tools"
   android:layout_width="match_parent"
   android:layout_height="match_parent"
   tools:context=".MainActivity">

   <WebView
       android:id="@+id/my_webview"
       android:layout_width="match_parent"
       android:layout_height="match_parent" />

</RelativeLayout>
Build Android APK and Test on Android smartphones.
Yes, instead of building APK, you can pair your android device through wireless debugging. By clicking on the No devices icon. And, when you click on Run > Run ‘app’. The app will get auto-installed on your Android Smartphone. Alternatively, you can Install the Android 13 Tiramisu Emulator using Android Studio.

Or, you can follow these steps to build an Android APK. After that, you can test on Computer using Windows Subsystem for Android.
- To create Android APK. Click on Build > Build Bundle (s) /APK (s) > Build APK (s).

- Android Studio will now start creating your web app. And, you will see APK generated successfully message at the bottom left corner of the screen.

- Click on Locate from the small window. And, file explorer will get open. You will find your Website based Android App with the “app-debug.apk” name. First move that file to your desktop, so you can easily access it.

- To connect your Android Phone through USB. And, transfer the APK file to your Android Smartphone.
- Open the APK file in your Android and tap on Install. Make sure unknown source permission is enabled.

- If you’re using the latest android, you will get a popup window that is Blocked by Play Protect. Just tap on Install Anyway.
- Next, send app for scanning window will appear, tap on Don’t Send.
- That’s it, App will now get open. Make sure your device has an internet connection. Since this app is based on Website.

That’s it, so that’s how you can convert any Website into an Android App. Yes, you can even change the Android App icon. You can watch videos about it, or you just wait for our next article. The process might look complicated develop Android App. But by developing this simple WebView-based app you can start your Android development journey.
If you are facing any problems during this app development, leave a comment. Or, you can ask ChatGPT to help you fix the errors. However, if you follow all steps carefully, then you will able to build an error-free Android App.