
In Windows 11, Microsoft introduced the Widgets Feature. You can access it from the taskbar or by pressing Windows + W keyboard Shortcut. It offers so many useful widgets like Weather, Calendar Microsoft To do, Sports, Photos, Gaming, and many others. It even keeps you updated with the latest news. But the only bad part about it is you cannot add these widgets to Windows 11 Desktop. Yes, the Weather widget does appear in the Windows 11 taskbar. Once you add it to the Widgets section. But that’s it.
If you want to add Widgets to Windows 11 Desktop. Then, you have to install a third-party application from Microsoft Store.
Contents
Add Custom Widgets to Windows 11 Desktop
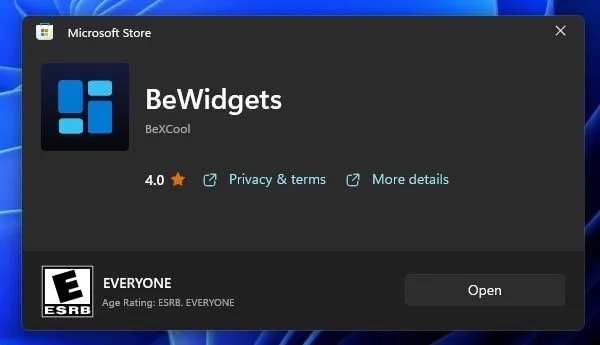
BeWidgets App for Windows 11
Are you missing Windows 7 Desktop Gadgets? Then you can now get those widgets in modern design on Windows 11 through BeWidgets App.
BeWidgets is a free and open-source App for Widgets. That allows customizing the Windows 11 desktop with various custom widgets. Like, Time, Date, Photos, App Shortcut, Finances, Weather. The app allows the creation of multiple layouts. The best part is you can set Widgets position as you want. Moreover, you can change the text color of Widgets. Even by enabling beta options, you can add a custom widget as well. That you can use for third-party applications.
Install BeWidgets App from Microsoft Store.
- Do open Windows Search by pressing
Windows + Skeyboard shortcut.
- In Windows Search look for Microsoft Store and open the App.
- Once Microsoft Store gets open, search for BeWidgets App.
- Click on Get to install the App on Windows 11 Computer.
- Once the BeWidgets app gets installed, click on Open.
Add Clock Widget on Windows 11 Desktop
- Click on New Widget, and immediately Clock Widget will get added to your Desktop.
- You can now drag and drop it anywhere on your desktop.
- Click on the X icon next to “New Widget” and type Clock.
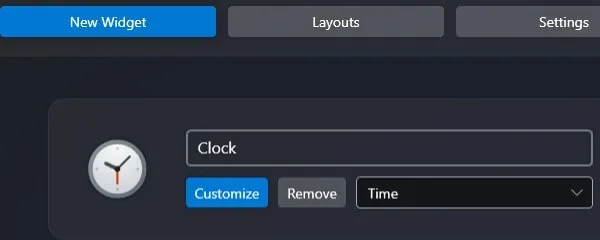
- Now, click on Customize.
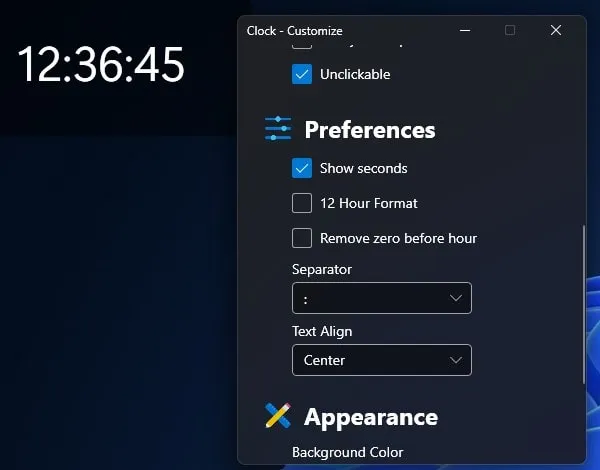
- Clock Customize Window will appear. First, to lock the Widget position, do enable the Unclickeble option.
- After that scroll down and in preferences, you can enable seconds in Clock. In addition, you can enable a 12-hour clock as well. And, can remove zero before the hour clock.
Tip: Yes, by default Windows Taskbar clock doesn’t show seconds. But yes, you can show Seconds on Windows 11 System Tray Clock. Do read my article on it.

- You can also change the separator and align the Time Text.
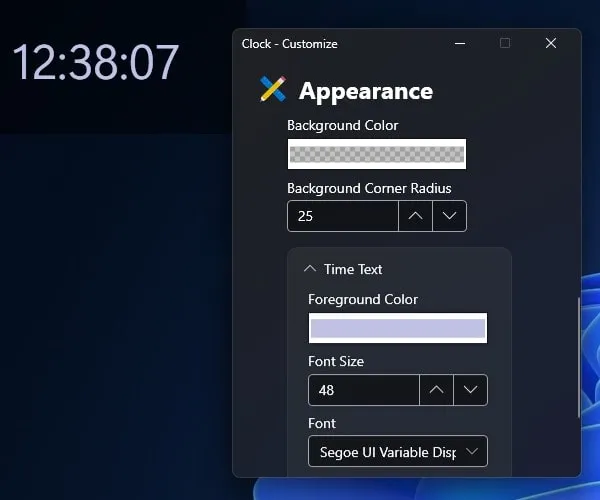
- Scroll down and you can now change the color of Time Text as well.
Add Calendar Widget on Windows 11 Desktop
- Simply click on New Widget. And, automatically Date Widget will appear on the desktop. If not then click on Time and from the drop-down menu select Date Widget.
- First, place the appropriate location of the date widget. Just drag and drop it on the desktop.
- Now rename “New Widget” to Calendar by clicking on the X icon.
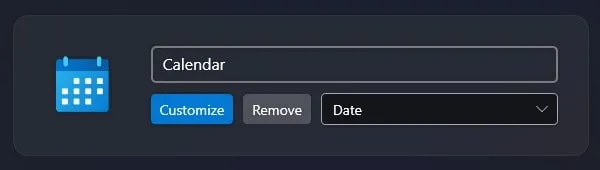
- After that, click on Customize, and the Calendar Customize window will appear.
- First do enable the Unclickable option.
- Now, from preferences, select date format and separator.
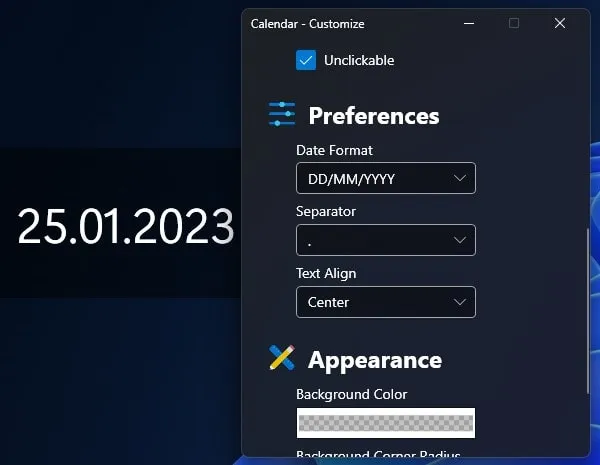
- Scroll down and you can customize the text color of the Date Widget.
Yes, Microsoft Outlook Calendar offers so many features. But, if you want to show the date on the desktop then it’s the best widget.
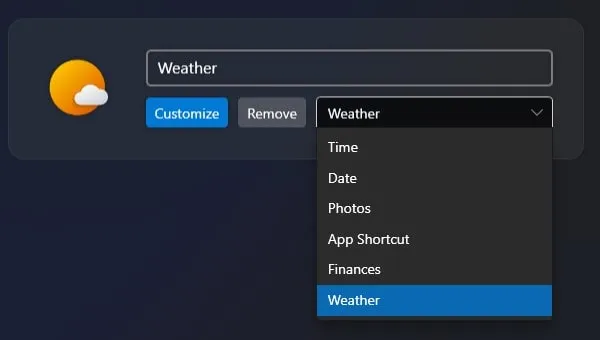
Add Weather Widget to Windows 11 Desktop
Although, by default, Windows Widgets does show whether in Taskbar. But, if you want to see information right from the desktop, then you can use BeWidgets App.
- Open BeWidgets App and click on New Widget.
- New Widget will appear, click on Time, and from the drop-down menu, select Weather Widget. And immediately weather widget will appear on the desktop.
- Now, set the widget position by using the drag-and-drop feature.
- After that, rename the Widget name from “New Widget” to Weather.
- Click on Customize to change location.
- Weather Customize window will appear, first enable the “Unclickable” option.
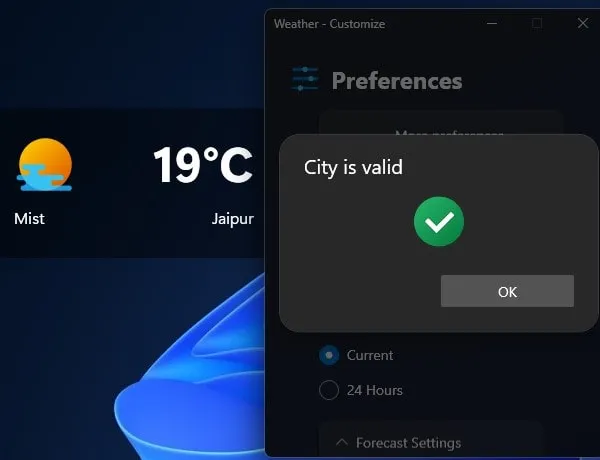
- After that, scroll down and click on Set City.
- Load City window will appear, type your current city and click on Add.
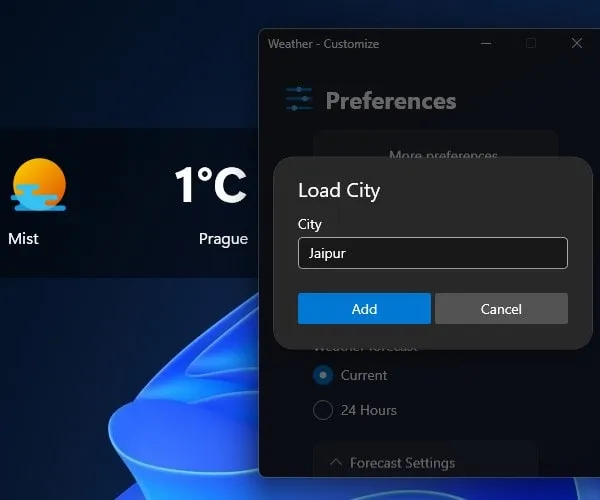
- The city is Valid message will appear. If you get an error then it means something is wrong with the weather app server or your Internet.
- Once you set the city you can choose the weather forecast for 24 Hours. And, the weather widget will show you the next 24 hours’ report.
- Next, by clicking on the forecast setting you can change the temperature unit. In addition, you can enable or disable the Unit as well.
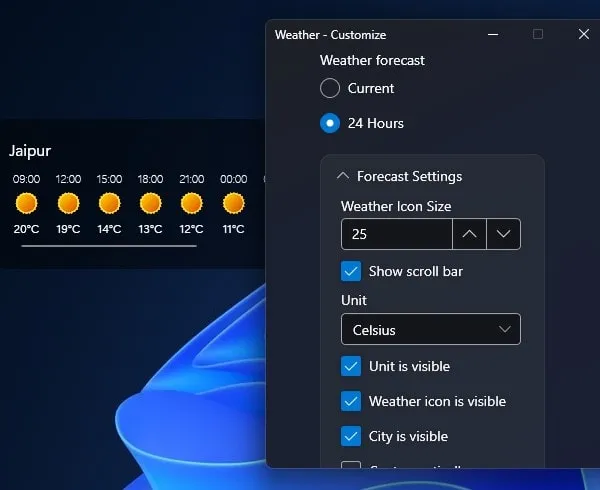
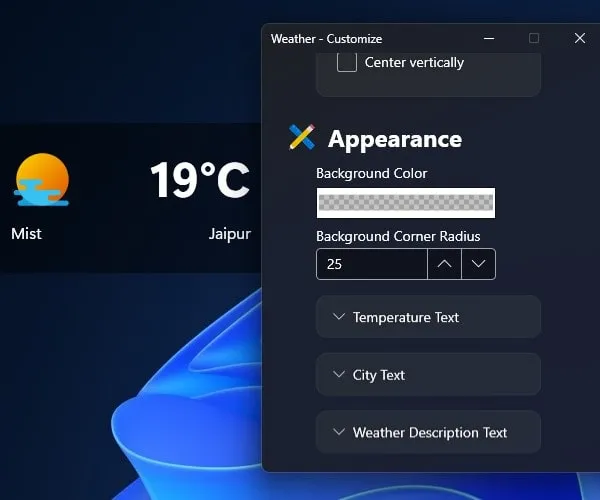
- After that, scroll down and you can change the background color of the Temperature, City, and Weather Description Text.
By using the same New Widget and Customization options you can create more widgets. Like Photos, Finance, and App Shortcut.