
If you’re a developer, then ChatGPT is a boon for you. It’s been months since ChatGPT is released publicly. And still everyday developer are finding new use cases for ChatGPT. You can integrate ChatGPT in various applications as an extension. Like, you can add ChatGPT Bot to your Discord Server. Now, ChatGPT is not only limited to an AI Chat Bot. It is now can be your personal AI programmer. Yes, now you can add ChatGPT Extension to Visual Studio Code.
There are various VSCode extensions available to use ChatGPT for programming. In this article, we”ll discuss the two best extensions.
OpenAI API Key
In order to use any ChatGPT Extension. You need to generate an API Key from the OpenAI Platform. And, after that, you can add the API key to the installed VSCode ChatGPT Extensions. No worries, you will find step-by-step instructions in this article.
In reference to OpenAI API Key, Application Programming Interface is known as API. It allows developers to utilize the OpenAI’s AI models in their own Applications. API Key is a unique key that is also used to authenticate a user or a developer. So basically, different platforms can use API keys in different ways.
Is OpenAI API Free to Use?
To explore and experiment with API, OpenAI does offer free $5 worth of free tokens for all new users. Although, these tokens are valid only for 3 months. So yes, you can generate API Key for ChatGPT for free. And, can try these extensions for free.
Best ChatGPT Visual Studio Code Extensions
ChatGPT by Ali Gençay
It is the most widely used VS Code ChatGPT extension. Once you install the extension, you will find the ChatGPT icon on the left pane. And, by clicking on it, you can open ChatGPT Conversation Window. From it, you can ask questions to ChatGPT, as you do in the browser. Yes, you must have to enter your API Key first to use the extension functionality.
The extensions also get integrated into the Visual Studio Context Menu. And, it does provide some pre-created options to enhance your productivity. This means, with just one click you can test, optimize and complete your code. Even, you can add comments to your code. Here’s how to install and set up this ChatGPT Extension in VS Code.
- Open Visual Studio Code and do open a Code File in it.
- From the left pane, click on the Extension Icon. (Or, do press the
Ctrl + Shift + XShortcut)
- After that, search for ChatGPT extension in Extensions Marketplace.
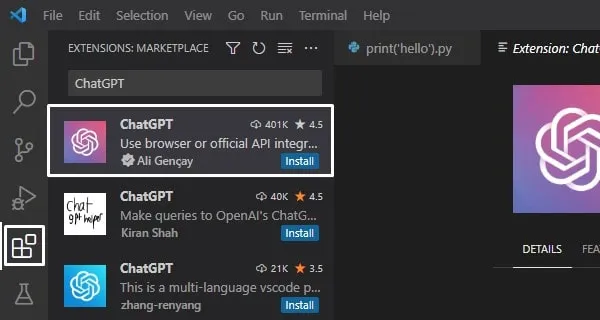
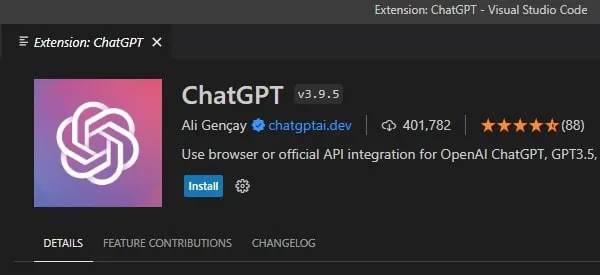
- Click on the first extension that appears to open ChatGPT Extension Window. Click on Install.
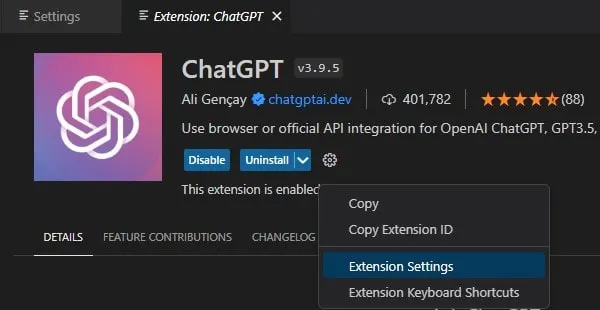
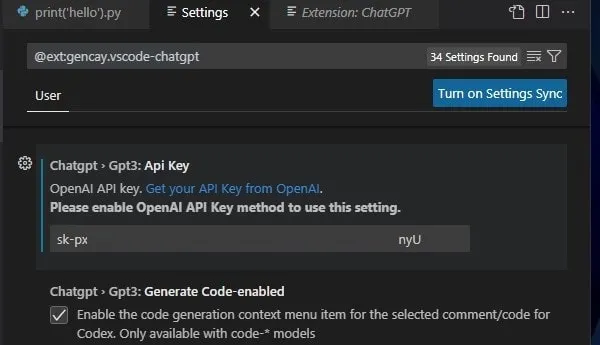
- Once the extension gets installed, click on Settings (gear icon) > Extension Settings.
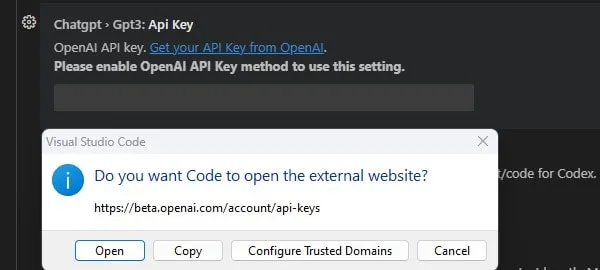
- Now, look for the “Chatgpt > gpt3: API Key” section. Click on Get your API Key from OpenAI”.
- A popup window will appear, click on Open. (You can also copy the URL and open it in your preferred web browser.)
- Open AI Platform API keys webpage will get open in the browser. (If you’re not logged in then you have to log in first.)
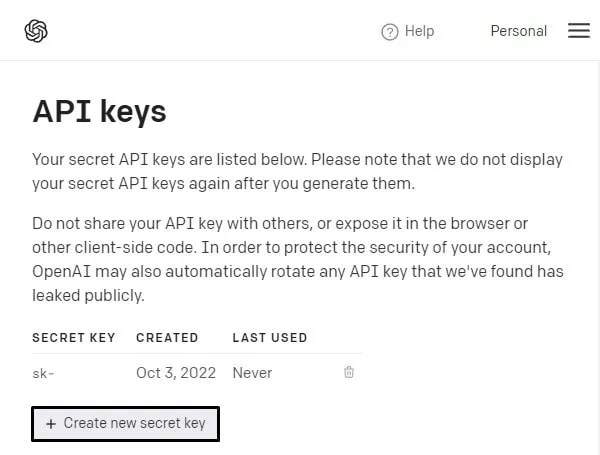
- Click on “Create new secret key”.
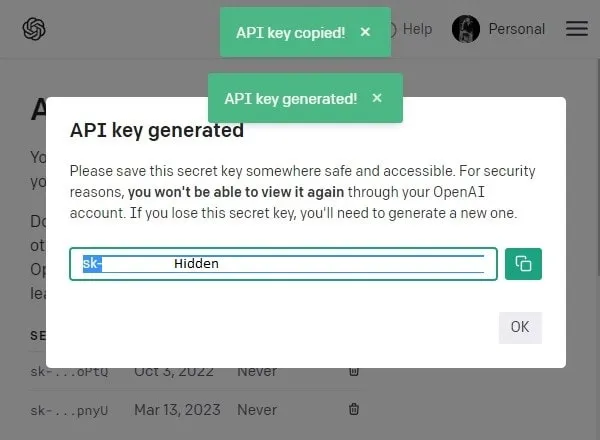
- And now a new API Key will get generated. Click on Copy Icon.
- Go back to Visual Studio Code. And, now paste your API Key. You can also “Turn on Settings Sync” if you use Visual Code across multiple devices.
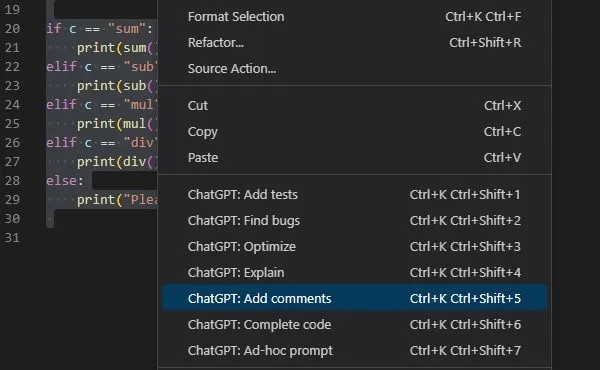
- That’s it, now go back to your code file. Select your code and right-click on it. You will now see multiple ChatGPT extension options.
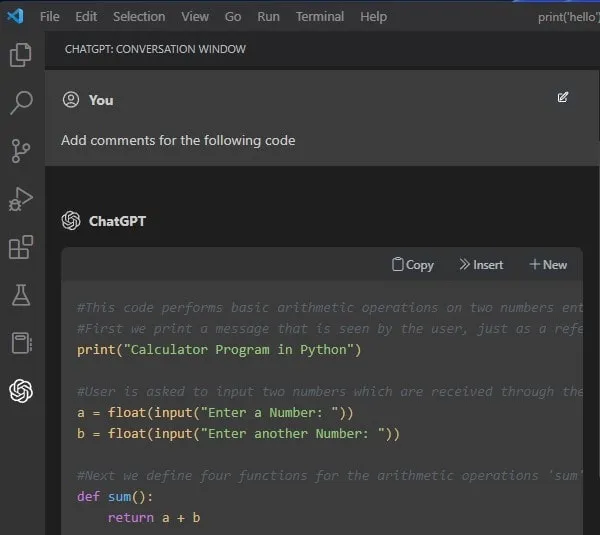
e.g. I have selected “ChatGPT: add comments“. Now, ChatGPT will add comments on the code to explain what each line of code does.
- You will now get three options.
- Copy – You can copy code and create a new File.
- Insert – This option will insert ChatGPT-generated code into your current file.
- New – A new file will get created using the code generated.
- Alternatively, you can click on the ChatGPT icon from the left pane.
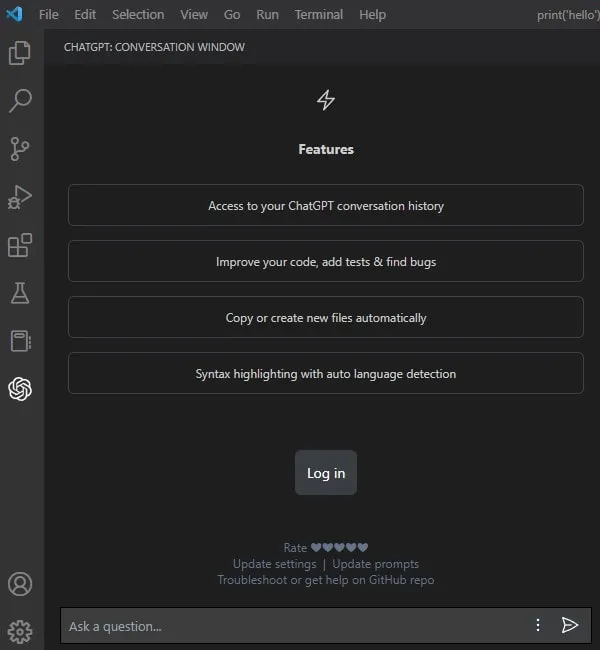
From here, you can directly ask any coding-related questions to ChatGPT. And, it will definitely enhance your productivity.
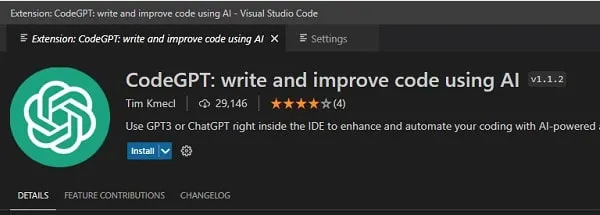
CodeGPT by Tim Kmecl
CodeGPT is another VS Code extension, based on the ChatGPT model. This extension is mainly designed to write and improve your code using AI. Apart from the ChatGPT model, it comes with four different GPT3 models to choose from. Like, Text-DaVinci-003, Text-Curie-001, Code-DaVinci-002, and Code-cushman-002.

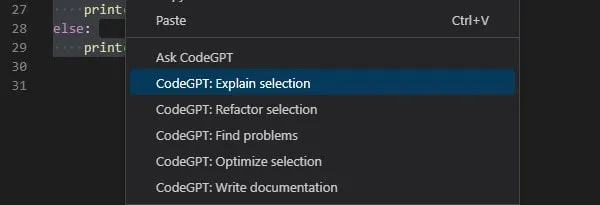
The best part about this extension is it shows, how many tokens you’ve used. Like the ChatGPT extension, it also allows asking questions directly. Yes, it also comes with some prefix prompts, which you can find in the context menu of VS Code. Like, Explain Code, Refactor, Do find problems in Code, Optimize Code, write documentation. Setting up CodeGPT is quite similar to the ChatGPT extension.
- Search for CodeGPT extension in VS Code. And, click on the first search result.
- Click on Install to install the extension.
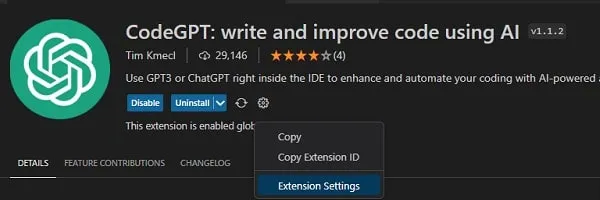
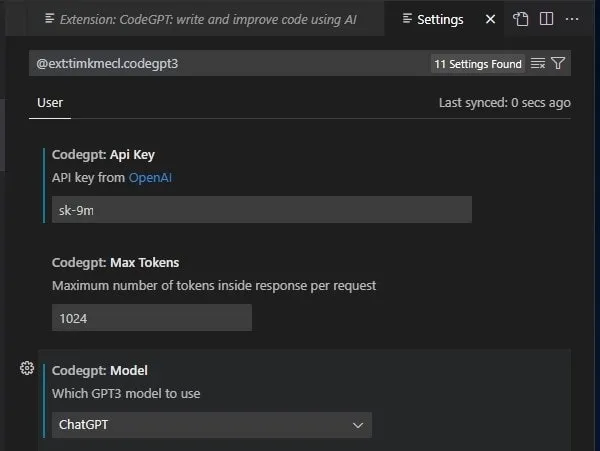
- Once CodeGPT gets installed, click on the settings icon > Extension Settings.
- In the CodeGPT settings page, select the ChatGPT model, and after that enter Open AI API key.
- That’s it, now select any code and right-click to use CodeGPT prompts.
- Alternatively, from the left pane, you can click on the CodeGPT icon and you can ask questions directly.
FIX – ChatGPT Error HTTP 429 Too Many Requests
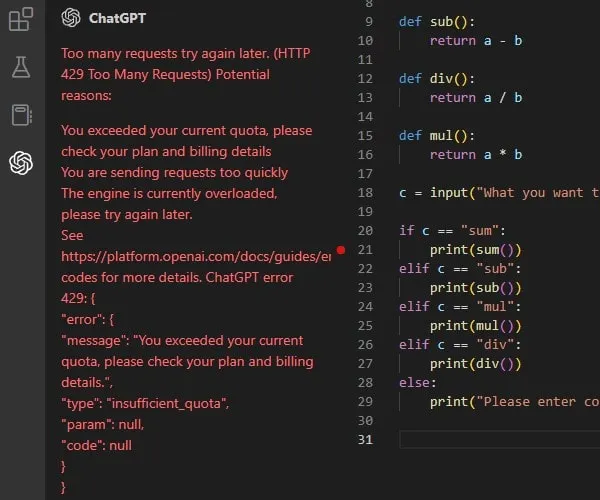
You might get this error, even if you’re using OpenAI API first time. This error usually occurs to old ChatGPT users. If you’re using ChatGPT for free, for a long time. Then, chances are you might have hit your maximum free monthly tokens limit. And, you will get a message that “You exceeded your current quota, please check your plan and billing details.”
Or, there is some problem with your Open AI Account. To fix this error, simply create a new OpenAI Account. And, create a new API key from it. Yes, you can borrow the API key from your friend’s Open AI Account.