The Internet speed keeps improving every year. As a result, people are aggressively switching to faster Internet connections. To take full advantage of faster internet, people are switching to high-bandwidth routers. Because of this, the old router becomes useless, but not anymore. You can use an Old Wifi Router as Wifi Extender Wirelessly. That way you will be able to boost your WiFi signals. Many people buy WiFi extenders or repeaters to extend their WiFi range. This allows them to use their WiFi connection from a distance.
If your WiFi router also doesn’t cover your entire house/office. But, you have an unused old TP-Link router lying around. Then don’t make the mistake of buying a WiFi Extender/Repeater. This article will help you to save some bucks by converting an old TP-Link Router to a WiFi Repeater. The process sounds complicated, but it’s quite easy. Also, if you’re an iPhone user, then now you can program NFC Tags with iPhone.
Contents
Convert Old TP-Link WiFi Router to Wifi Extender/Repeater
We will connect our main WiFi router to our old WiFi router through WDS Bridging. And, for this, you don’t need any LAN Cable. This means we will provide signals from our main router to the old router. After that, we will broadcast the same signals from our old spare router to wireless devices.
Important: To demonstrate, I am using a TP-Link TL-WR740N Router. Each router comes with different settings. So you might need to figure out some settings by yourself. But, the process is the same for every router.
Reset Your Old WiFi Router
You may have changed some router settings previously. Or, you may have forgotten the router’s WiFi Password. So, it would be better if you first reset your router. Every router comes with a reset button at the back. You can press it by using a small PIN.
For TP-Link Routers
- First, connect the TP-Link Router to the Power Adapter and turn it on. Now, wait for a few seconds to turn it on properly with all required LED lights.
- After that, use a small pin and press and hold the WPS/RESET button for 10 seconds. (You have to press and hold the RESET button until the SYS LED starts blinking quickly from slow blinking.)
- After that, release the button. And, just wait for the router to reboot to its factory default settings.
- All Router LEDs will turn on and off. And after that, the Power, Sys, and WiFi LED will turn on. This means the router is now reset to factory default settings.
Change the Main Router Channel
To use the TP-Link Router as a WiFi Extender or Repeater, both old and main routers should be on the same wireless channel. So first we are going to change the channel of our main router. The main router is the one you’re currently using to connect to the Internet.
- First, you have to log in to your Router Settings Page using a browser. If you don’t know login details check the back of your router, and you will find an IP address, with login details. (And, if that doesn’t work, then contact your Internet Service Provider (ISP).)
- Once you successfully log in, go to the wireless settings page. And, after that, set the channel number to 1. (You can select any channel between 1 to 11. But, it should be the same for both routers.)
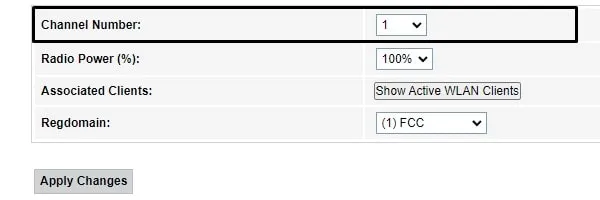
That’s it, now save this info. You don’t need to make any more changes to your main router.
Make sure IP addresses are Different
As you know, an IP address is a unique address that identifies a device on the internet, or on a local network. So, the IP address cannot be the same for your main router and old TP-Link Router. For routers, the IP address is nothing else but just the login address that you use.
So do check the backside of the TP-Link Router and you will find the IP address with login details. Make sure your old router IP address is not the same as your main router. If yes, then make changes to the Old Router.
IMPORTANT: If IP addresses are already different, then you can skip this part.
- Connect your computer/smartphone to the old TP-Link Router WiFi connection.

- After that, use the login details mentioned at the back of the router to log in. Here are the default login details of the TP-Link Router.
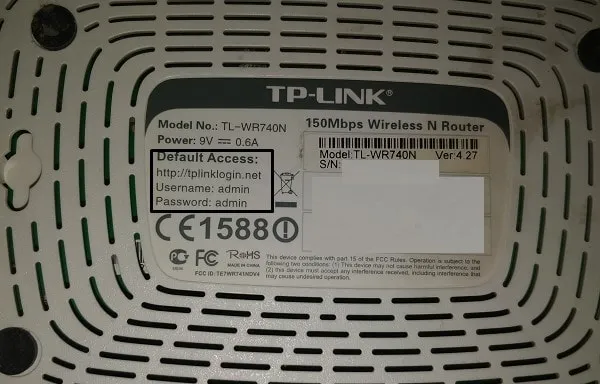
192.168.0.1
Username: admin
Password: admin
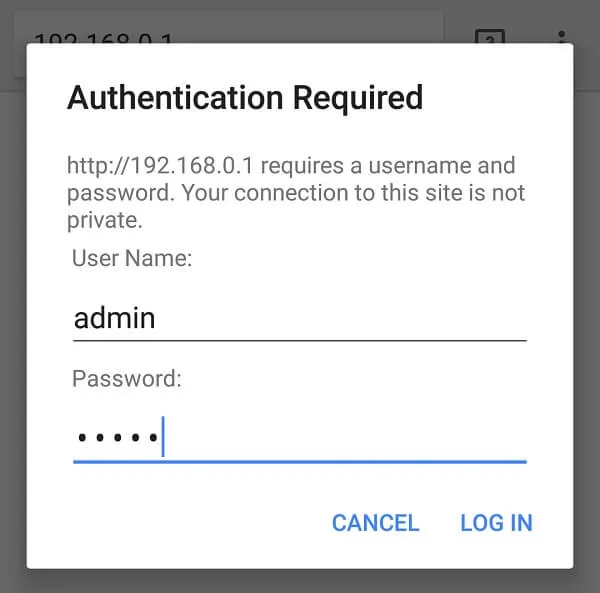
Note: Enter the IP address in the address bar to open the Router Settings Page. Do not enter it on Google or any other search engine.

- Once the TP-Link Router settings page gets open. From the left side, click on Network > LAN.
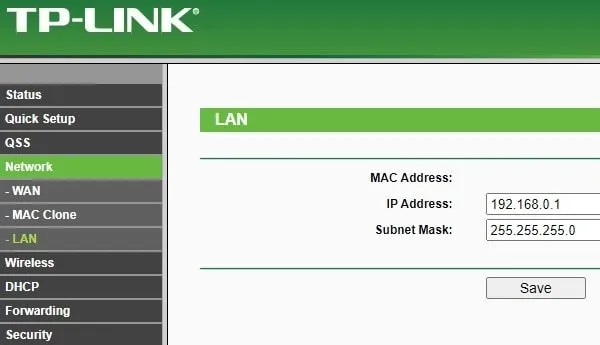
- Here you will find the IP address of your old router. If the same IP address is set for your new router. Then, from here you can change it. You can type the following IP address. Click on Save and Reboot Router.
192.168.1.1
- Now, use the new IP address to log in to your Router Settings.
Enable WDS Bridging
Here comes the main part, now we are going to convert the router into a repeater. WDS Bridging is considered a repeater mode.
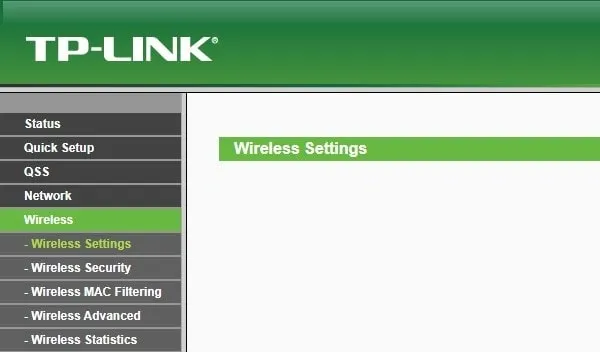
- From the left pane, go to Wireless > Wireless Settings.
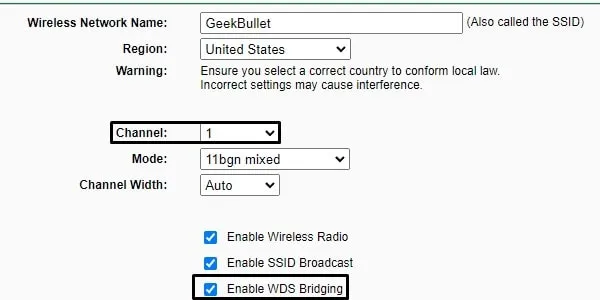
- In Wireless Network Name, enter a new WiFi name. Although, you can keep it to default if you want.
- By default, the channel will be in Auto Mode. Select 1, as we selected in the main router.
- Now, enable the WDS Bridging option. And, a few more options will appear.
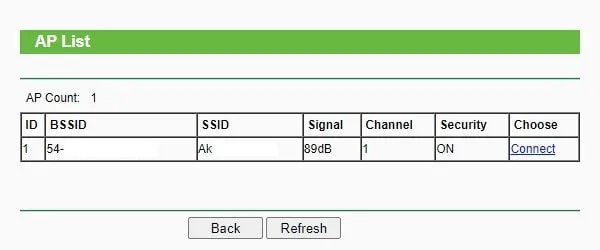
- Click on Survey to scan the Wireless Network on the same channel.
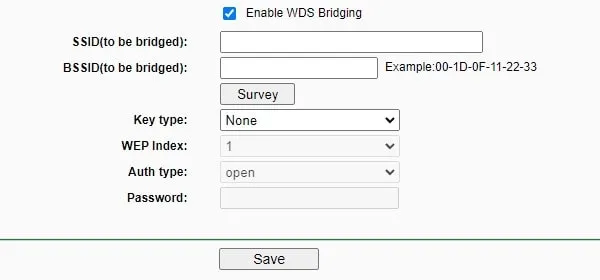
- After that, the AP list will appear. Find your WiFi network and click on Connect next to it.
- Now you have to enter your active WiFi connection password.
Select WPA-PSK/WPA2-PSK in key type. And, do enter the password of your WiFi network.
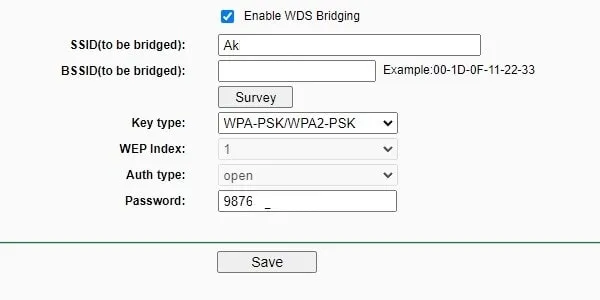
- Click on Save. No need to reboot now.
Set a Password for WiFi
We have successfully connected the main router to the old router. Now we have to set a password for the Old Router.
- Click on Wireless Security from the left pane.
- Select WPA/WPA2 – Personal radio button. And, enter a unique password.
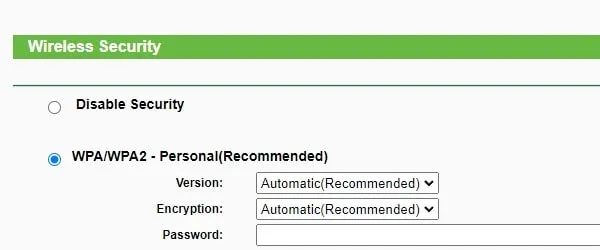
- Scroll down and click on save.
- A message will appear to ask you to reboot. Click on OK.
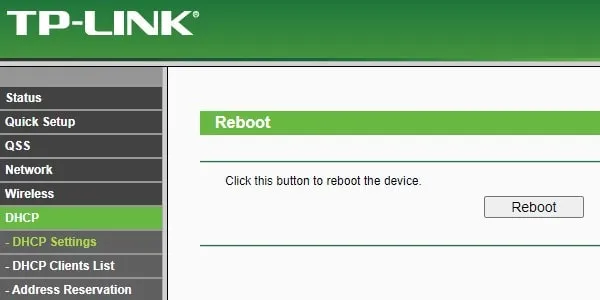
Disable the DHCP Server and Reboot the Router
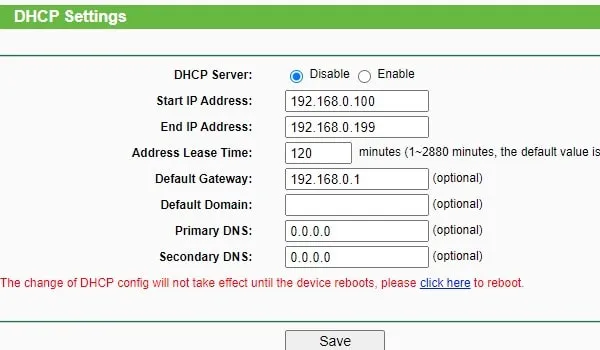
Before you reboot, you have to disable the DHCP Server.
- Click on DHCP > DHCP Settings.
- Select the Disable option and click on Save.
- After saving, click on “click here”.
- A Reboot window will appear. Click on Reboot.
- A confirmation window will appear, click on OK.
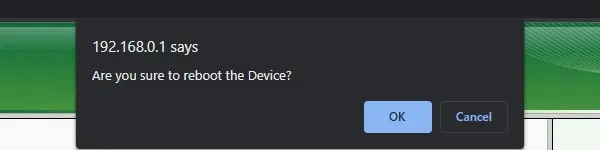
- Wait for the process to complete 100%. And once the router reboots wait till the router gets turned on.
Connect to the new WiFi Extender
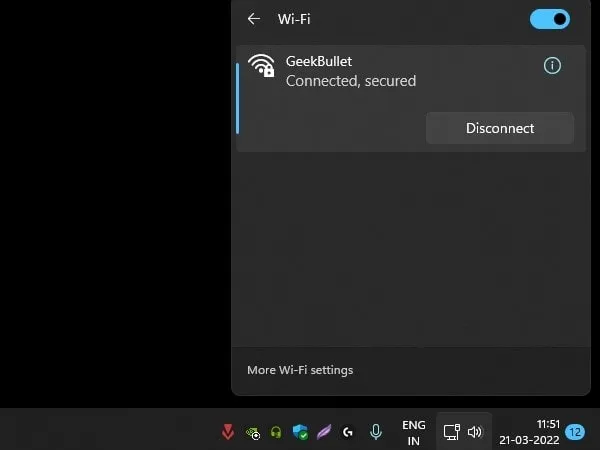
That’s it, now connect your smartphone/computer to the new WiFi connection that you have created. And, test the Internet. It will work fine. Place the old router where WiFi signals are weak. That way you will be able to use the old WiFi router effectively. So that’s how you can use a TP-Link Router as a WiFi Extender. Let me know in the comment section if you face any trouble.