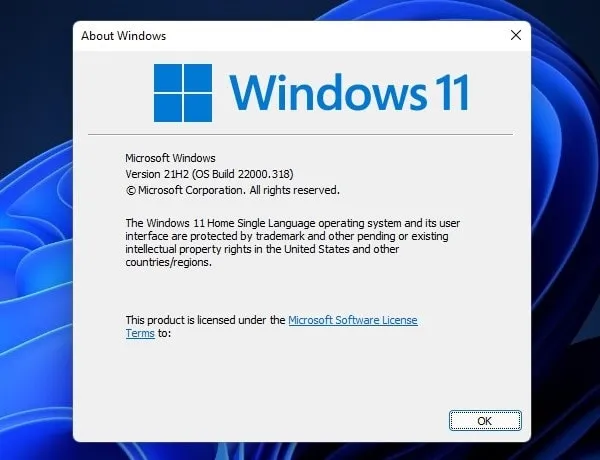
It’s quite easy to enable Sandbox in Windows 11 Pro and Enterprise edition. You just have to enable the Windows Sandbox feature from optional features. But, when it comes to Windows 11 Home editions, things are a bit tricky. Because, like group policy editor, Windows Sandbox is also missing in Windows 10/11 Home edition. But, no worries, by enabling a few things from BIOS settings, and by running a custom batch file. You can now install Windows Sandbox in Windows 11 Home as well. But, if you haven’t heard about sandbox before then, first you need to know about it.
Although, in our Windows 11 sandbox setup guide, I explained about Windows Sandbox in detail. So, do check out that article, if you’re Windows 10/11 Pro and Enterprise user.
What is Windows Sandbox?.
Windows Sandbox is nothing else but a lightweight Windows 11 Virtual Machine. It allows users to test untrusted Windows applications in isolation. This means Apps installed in Windows Sandbox will not affect the host machine in any manner.
To run a Windows 11 virtual machine, lots of hardware resources are required. And, you have to install VMware or VirtualBox to create the virtual machines. But for Windows Sandbox, you don’t need to go through any setup process. Sandbox is an App that uses Microsoft’s hypervisor technology. It gets 40GB of virtual hard disk space. But, since the sandbox uses dynamically generated images, so it only takes 100MB. Yes, you can copy-paste files directly in Windows 11 Sandbox App.
When you open the Sandbox App, Windows 11 desktop appears directly, no setup is required. You can simply test the application in a virtual Windows enviourement. And, when you close Windows 11 Sandbox, all data and installed app gets deleted automatically. It doesn’t save anything, because it is for testing purposes. So, every time you open the Sandbox App in Windows, you will get a fresh version of Windows 10/11.
Contents
Enable Windows 11 Sandbox in Home Edition
Enable Hardware Virtualization Technology in BIOS
Before you proceed with the Windows Sandbox installation process, make sure Virtualization is enabled from BIOS. Hardware VT is a processor feature to run virtual machines on Windows PC. If you are going to install Windows Subsystem for Android and VirtualBox to run Virtual Machine, then you have to enable it. And since Windows Sandbox also utilizes Microsoft’s hypervisor technology, that’s why you have to enable it. Windows 11 Home usually comes preinstalled with laptops. And, almost all laptop manufacturers offer this feature in BIOS settings.
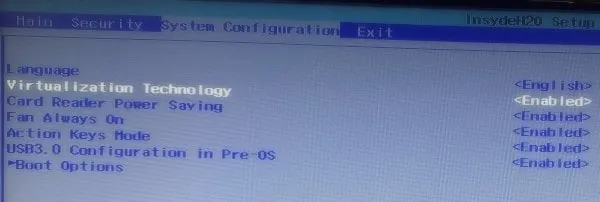
So, do open the BIOS setup by pressing the appropriate key during the startup process. And, from BIOS settings, you can enable Hardware Virtualization. In my HP Laptop, the Virtualization Technology option is available in the system configuration settings of BIOS.
Windows 11 Home Sandbox Installer
- Do download the Windows 11 Home Sandbox Installer batch file.
Important: Yes, you can create your own batch file with the code. But to keep things simple, we create a batch file to install the sandbox. Chrome might prevent you to download this batch file, do click on keep. This batch file is completely safe. Open the batch file in a notepad to view the code.
- Once, the batch file gets downloaded, do right-click on it and then click on “Run as administrator”.
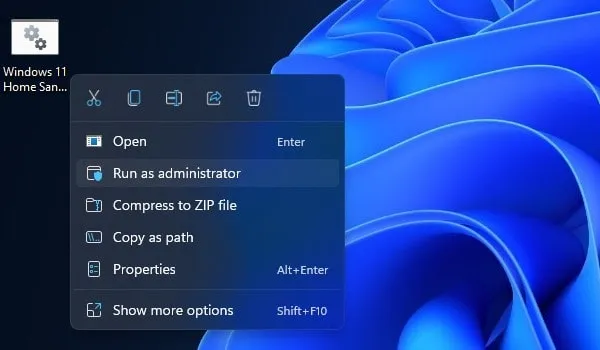
UAC window will appear, click on yes.
- CMD window will get open. And, it will now use the “Windows Deployment Image Servicing and Management tool (DISM)” to download and install Sandbox.
DISM is a command-line tool to service Windows images. It is also used to repair Windows Images. But, here we are using it to install Windows Sandbox.
- The process will take a few minutes, so keep patience. Once DISM successfully enables the Windows Sandbox optional feature, it will ask you to Reboot. Do press Y to reboot.
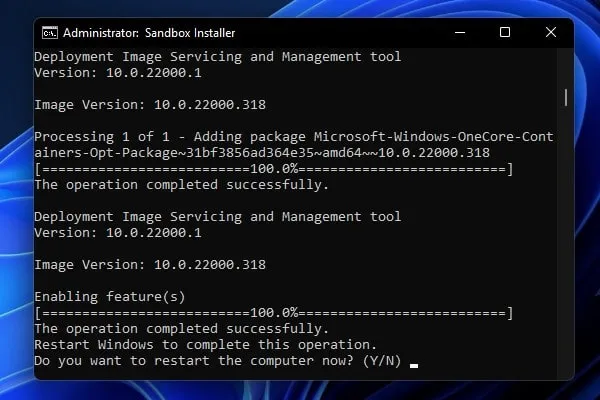
- That’s it, Window will now restart. The restart process will take a few minutes.
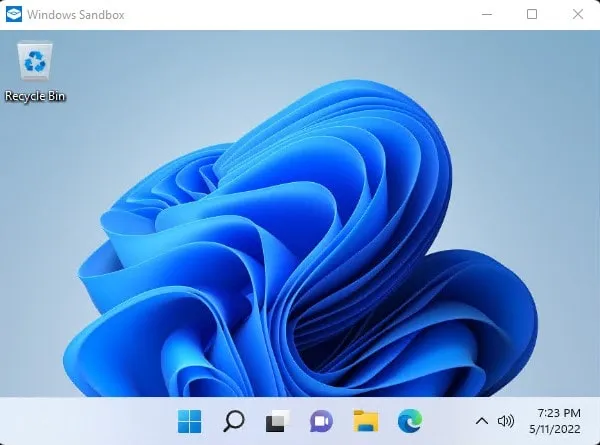
- Once, Windows get restarted, click on the search icon. And, do a search for Windows Sandbox.
- Windows Sandbox App will appear in search results, click on Open.
- That’s it, Window Sandbox Client will get open. You can now run Apps in an isolation enviourement.
So, that’s how you can enable Windows Sandbox on Windows 11 Home Edition.
Uninstall Windows Sandbox from Windows 11 Home
After enabling the Windows Sandbox feature through DISM Tool. It will now be visible in Windows Optional Features. So, by disabling it from Windows optional features, you can disable it.
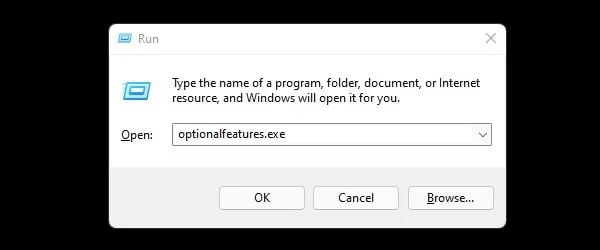
- Press Windows + R key to open Run Window.
- Do type optionalfeatures.exe in the Run window and press enter.
- Windows Features window will appear, scroll down and you will find Windows Sandbox enabled.
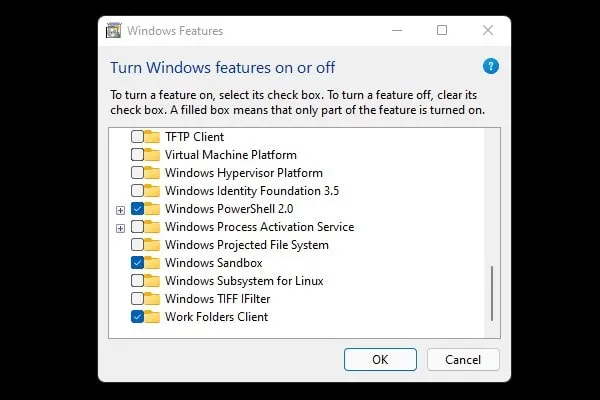
- Unmark Windows Sandbox to disable and click on OK.
- Windows will now apply changes and ask you to restart. Click on Restart now.

Windows 11 Home will now get restarted and Windows Sandbox will get uninstalled.

Windows sandbox failed to initialize Error.
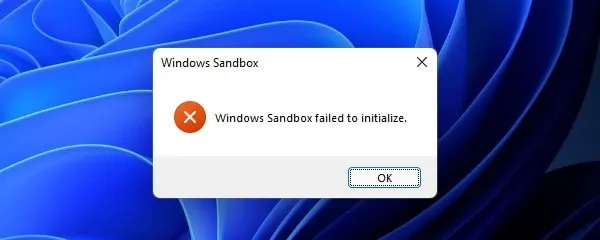
If you get the “Windows sandbox failed to initialize” error. That means your hardware and Windows version don’t meet the minimum requirements. Or maybe you have installed Windows 11 on an unsupported computer.
Solution: Unfortunately, there isn’t any solution available for this error now. And, you cannot fix this error by enabling/disabling any Windows feature. So, I suggest you create a bootable Windows multi-edition USB Drive. And, install Windows 11 Pro version on your computer. Because in Windows 11 Pro version Windows sandbox will work flawlessly.